This post may contain affiliate links. If you click an affiliate link and make a purchase, I may earn a commission. Also, as an Amazon Associate, I earn from qualifying purchases.--
Have you ever ridden a bike and felt like the brakes weren’t quite cutting it? Maybe you were going downhill or trying to stop suddenly and your trusty V brakes just didn’t have the stopping power you needed.
If you’ve experienced this frustration, you might have considered upgrading your bike to disc brakes. Disc brakes are more powerful, more reliable, and offer better modulation than V brakes, making them a popular choice for serious riders. However, the thought of converting your bike to disc brakes might seem daunting, especially if you’re not particularly handy with tools. Fear not!
To convert V-brakes to disc brakes on a bike:
- Remove the V-brakes, handlebar levers and front wheel. Then install a rotor that fits your bike’s wheel hub.
- You should then install the caliper, attach the brake lever and route the hydraulic brake lines.
- Finally, tighten the caliper bolts and test the brakes.
In this article, we’ll walk you through 9 easy steps to convert your V brakes to disc brakes and give your bike the stopping power it deserves. Whether you’re a seasoned mechanic or a complete novice, you’ll be able to follow these steps and have your bike running with new disc brakes in no time. So, let’s get started!
What are Disc Brakes?
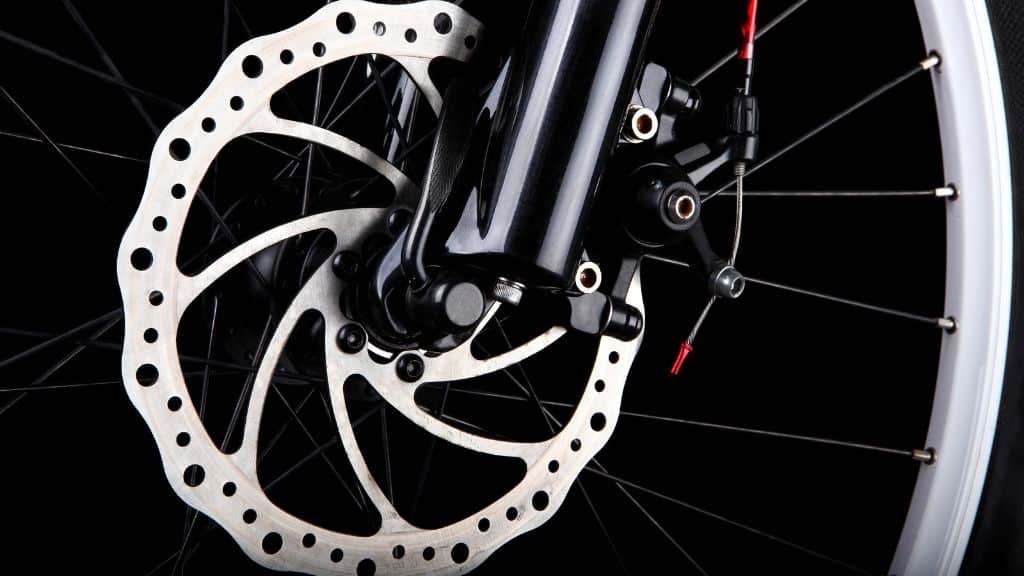
Disc brakes are a type of braking system in which the brake pads are housed in a caliper and create friction against a disc (rotor) that is directly linked to the wheel. The wheel moves more slowly due to the friction between the two surfaces.
Disc brakes have been increasingly common on bikes in the last couple of years, beginning with budget-friendly mountain bikes and hybrids. The broad availability of bicycles with disc brakes has made it more difficult for riders, especially beginners, to make a final decision on a bike.

What are V Brakes?
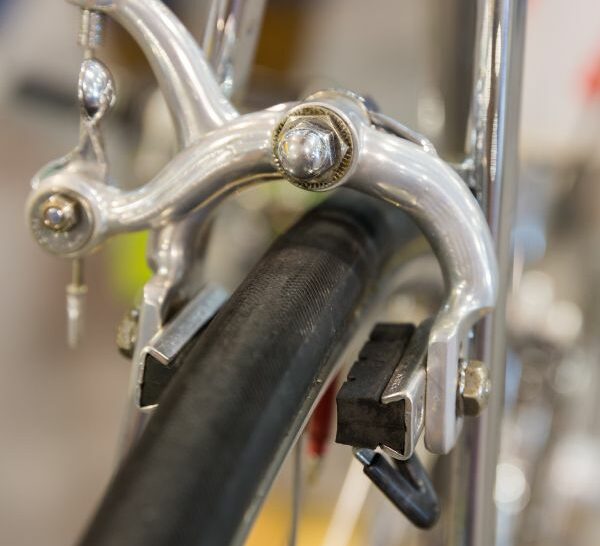
V-brakes, or direct-pull cantilever brakes to give them their official name, are similar to conventional cantilever brakes in that they consist of two sections that are fastened to bosses welded to the frame.
They are operated from the side, with the housing for the cable attached to one of the arms using a ‘noodle,’ and the inner cable secured to the other. Pads are retracted toward the rim as the cable is withdrawn through the housing and the two arms are hauled together.
Since a V-brake system doesn’t need a fixed cable stop on the frame or fork, it swiftly replaced the conventional cantilever brake on mountain bikes after it was introduced around the same time as suspension.
9 Steps to Convert V Brakes to Disc Brakes
Are you ready to upgrade your bike to high-performance disc brakes and say goodbye to the hassle of V-brakes? Then follow these 9 simple steps to convert your old brakes to new ones and enjoy a smoother, more reliable ride! (Source)
- Remove the V-brakes and Handlebar Levers
Take off those old, worn-out V-brakes and handlebar levers with a trusty hex wrench. Remember to note the brake cable routing and the brake lever positions before completely removing them.
- Remove the Front Wheel
Remove the front wheel to access the hub and rotor. Depending on your bike’s setup, you’ll need to use either a quick release or axle nuts. Don’t forget to keep those brake pads and rotor discs clean!
- Choose the Right Rotor
Select the perfect rotor that fits your bike’s wheel hub and matches your preferred disc brake system (center-lock or 6-bolt). Check the rotor’s direction of the rotation identification label before installing it.
- Install the Rotor
Time to install that rotor! Tighten all six bolts in a 6-bolt system, then turn them back by 1/4 turn (loosen). There should be some slack between the rotor and the hub.
After removing the rotor’s screws, turn it counterclockwise until the bolt holes are at their maximum distance apart. Hence, the possibility of the bolts being snapped off is reduced.
As the rotor is held in the timed position, the bolts are securely tightened by hand. Brake rotors can be attached to the wheel hub with either six bolts or a center lockring. Avoid warping or moving the rotor on the attachment flange by tightening the bolts in a star pattern. Lastly, use alcohol or brake cleaner to wipe the rotor down.
- Re-attach the Front Wheel to the Fork
Once the rotor is installed, reattach the front wheel to the fork. Make sure the wheel is centered in the fork and tighten the quick-release or axle nuts properly.
- Remove the Caliper Spacers
The brake caliper usually comes with red plastic spacers between the brake pads to keep them from closing too far. Remove the spacers, but keep them handy as they will need to be reinstalled whenever the rotor is removed from the caliper.
- Install the Caliper
It’s time to put the caliper in place. Just place the caliper over the rotor disc with the attachment points lined up. You should fasten the two bolts together loosely, just enough so that they won’t fall out. The caliper needs to be held securely but easily moved with one hand.
- Attach the Brake Lever and Route the Hydraulic Brake Lines
Connect the hydraulic lines to the brakes to the top of the handlebars on the left. After the line has been routed, a quick connection should be made between the brake lever and the handlebars. Press the brake pedal slightly and turn the wheel 2–4 times. This lines up the caliper with the brake disc.
- Tighten the Caliper Bolts and Test the Brakes
Now, it’s the moment you’ve been waiting for! Get ready to tighten those caliper bolts and put your new disc brakes to the test. Hop on your bike and give them a spin to bed in the brake pads, making sure to adjust them as needed for maximum stopping power.
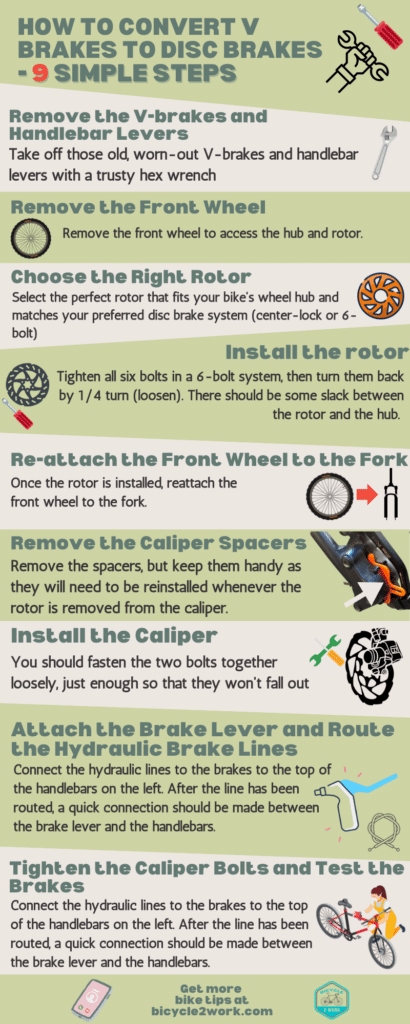
Here is an infographic with all the steps outlined for your convenience:
You can refer to this video to give a visual representation of how you could make the conversion to disc brakes:
5 Reasons why you should Convert V Brakes to Disc Brakes
Are you thinking of upgrading your bike’s braking system? While V brakes may have been the go-to choice for many years, disc brakes are quickly becoming the norm for serious cyclists. Here are five compelling reasons why you should consider converting your V brakes to disc brakes! (Source)
- Increased Stopping Power
Disc brakes have been shown to have significantly better-stopping power than V brakes, especially in wet or muddy conditions. With disc brakes, you can stop your bike faster and with greater control, which can be especially important when riding downhill or in traffic.
Imagine being able to stop your bike on a dime with just a light squeeze of your brake lever – that’s the kind of stopping power you can expect from disc brakes.
- Improved Durability
Disc brakes are generally more durable than V brakes, especially if you’re a frequent rider. V brakes are prone to wear and tear, and the brake pads need to be replaced more frequently. With disc brakes, the rotors and brake pads tend to last longer, which means less maintenance and more time riding your bike.
- Better Modulation
Modulation refers to the ability to control the amount of braking force you apply. Disc brakes offer better modulation than V brakes, allowing you to apply just the right amount of braking force for your riding conditions. Whether you’re descending a steep hill or navigating a technical trail, disc brakes give you the control and precision you need to stay safe and confident on your bike.
- Easier Maintenance
Disc brakes require less maintenance than V brakes. Since the braking surface is on the rotor rather than the rim, you don’t have to worry about replacing the entire wheel if the braking surface is worn. Additionally, disc brake pads are generally easier to replace and adjust than V brake pads.
- Enhanced Compatibility
Converting your V brakes to disc brakes can also improve your bike’s compatibility with different components. Many newer bikes are designed to work with disc brakes, and if you’re looking to upgrade your wheels or fork, you may find that disc brakes offer more options for customization.
Additionally, disc brakes are more widely used in the cycling world, which means you may have an easier time finding replacement parts or getting help with maintenance.
Overall, converting your V brakes to disc brakes can be a game-changer. Whether you’re a casual rider or a seasoned pro, the improved stopping power, durability, modulation, and compatibility offered by disc brakes make them a worthwhile investment for any cyclist!
Considerations for Choosing Disc Brake Components
Choosing the right disc brake components is an essential part of any successful V brake-to-disc brake conversion. With so many options available, it can be challenging to know where to start. But don’t worry, we’ve got you covered!
Mechanical vs. Hydraulic Disc Brakes
First and foremost, you’ll need to decide whether you want mechanical or hydraulic disc brakes. Mechanical disc brakes use a cable to actuate the brake caliper, while hydraulic brakes use fluid to transmit the braking force. Hydraulic brakes generally provide more consistent and powerful braking performance, but they can be more complicated to set up and maintain.
Post Mount vs. IS Mount
Once you’ve decided on the type of brake, you’ll need to consider the caliper mount type. Most modern bikes use either post-mount or IS-mount brakes. Post-mount brakes attach directly to the frame or fork with bolts that pass through the caliper, while IS-mount brakes use an adapter to attach the caliper to the frame or fork.
Right Rotor Size for Your Riding Style
Next, you’ll need to choose the right rotor size for your riding style and bike frame. Larger rotors provide more stopping power, but they can also add weight and affect the handling of your bike. Make sure to check your frame and fork specifications to ensure that you select the correct rotor size.
Organic vs. Metallic Brake Pads
Another important consideration is the type of brake pads you’ll use. Organic pads are generally quieter and provide better modulation, while metallic pads offer better heat dissipation and longer life but can be noisier and more abrasive.
Finally, don’t forget about other necessary components such as adapters, rotors, and hardware. Adapters are used to ensure that the brake caliper aligns correctly with the rotor, while the hardware is used to attach the rotor to the hub.
Disc Brake Installation on Bike with No Brake Mounts
If your bike has no disc brake mounts, you can try any of these three options to convert your V brakes into disc brakes!
Change Your Fork
Investing in a disc brake-ready fork is one of the easiest and least expensive ways to upgrade a “V-brake bike” to a disc brake. Doing so will allow you to install a front disc brake, giving you access to most of the advantages of disc brakes. The front brake is the most important because it provides the vehicle’s stopping force.
Due to the increased friction of the front wheel, the front brake is more effective. There is a forward transfer of body mass when braking. This results in the unloaded rear end sliding under heavy braking.
Change the Frame
Another option is to get a new frame that already has the brackets for the disc brake in the back. Some requirements must be met:
- New frame dimensions should match or closely approximate those of the old one.
- Frame dropout spacing must be identical to the previous frame. The wheel can’t be fastened to the chassis without this.
- The fork must be able to fit into the new frame’s headtube.
Try Adapters
Alternatively, you might replace the wheels and add disc brake adapters. In most cases, these brackets will be fastened to the fork or frame in addition to the axle. There are a few major drawbacks to using disc brake adapters, and they are:
- Bad for Aesthetics — those who place a premium on aesthetics for their bicycles are likely to be disappointed.
- Compatibility — unfortunately, not every frame or fork can use every adaptor. There may be serious compatibility problems in some instances.
- Tricky — the hassle of removing the tire is compounded by the fact that the adaptor is fixed to the dropout.
- Less effective — there are adapters out there that are of high quality, but there are also plenty that are weak or lack key features.
Conclusion
Converting your V brakes to disc brakes can be a daunting task, but by following the 9 steps outlined in this guide, you can achieve a successful conversion. Converting to disc brakes can significantly improve your bike’s stopping power, reliability, and overall performance, providing you with more confidence and control on the road or trail.
With basic mechanical knowledge and the right components, you can upgrade your bike to meet your needs and enhance your cycling experience. So go ahead and take the plunge, and enjoy the benefits of disc brakes on your next ride!