This post may contain affiliate links. If you click an affiliate link and make a purchase, I may earn a commission. Also, as an Amazon Associate, I earn from qualifying purchases.--
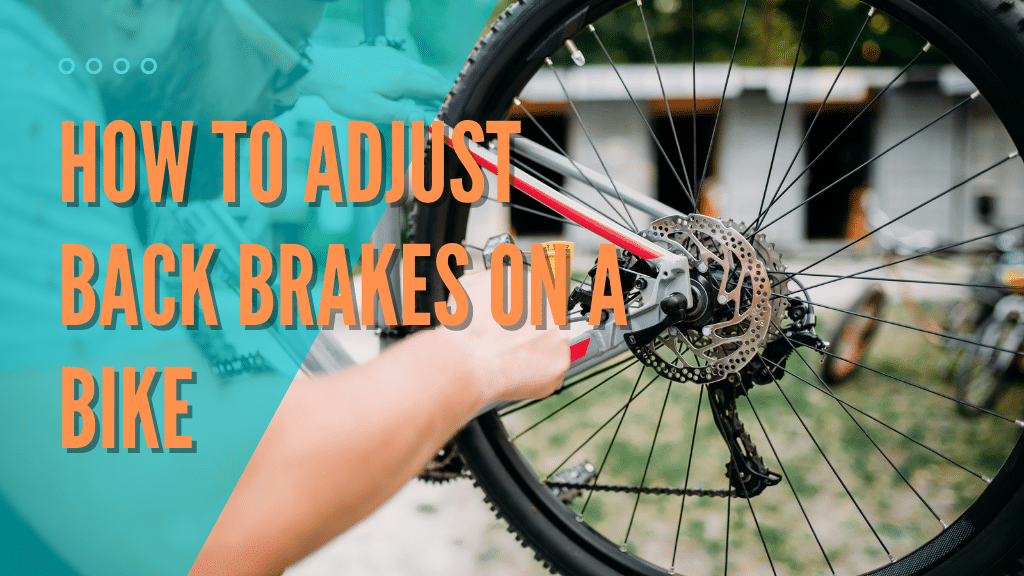
If there is one thing you need to do regularly as a bike rider, it is adjusting your bike brakes on a regular basis. It helps them operate better and keeps you safer on the road while riding.
The brake pads and brake cables are the two essential components of your bike’s braking system that you should be focusing on. Overused brake pads that are too low or too high on the rim can be dangerous in the long run. Brake cables that are way too loose can also make braking much more difficult than it has to be.
To adjust the back brakes on a bike, you will need pliers, a spanner, a ring wrench, and allen keys to fine tune the brake pads, wires and other components of the bike. You may also need anti-seize grease to improve the functioning of threaded components.
Let’s dive into the various techniques step-by-step, for adjusting your back/rear brakes.
Back to Basics: Braking
Bikes can have one of three braking systems: disc brakes, calipers, or V-brakes. Calipers and V-brakes use a braking cable mechanism, which is preferred by road and mountain bikers. Disc brakes are made up of a rotor and a piston that gradually provides friction to the disc so that the bike slows down or comes to a complete halt.
These are the closest to what you find on an actual motorbike or a car. Disc brakes are most commonly found on hybrid and touring bikes.
Almost every single bicycle brake is activated by pulling a lever attached to the handlebars. On bicycles that have a flat crossbar, such as mountain bikes, the brake lever is normally separate from the gear change clutch levers.
Drop-bar road bikes and dirt bikes often integrate the braking lever and gear selector into a single cohesive unit.
What tools will you need?
This adjustment will require the following tools: pliers, a spanner, a ring wrench, and Allen keys. Depending on your bike’s fasteners, you will have to use some specialized equipment. Anti-seize grease is recommended by some riders to improve the functioning of threaded components.
How Do You Change Your Bike Brakes?
This video will be a helpful visual aid to this article, in case more help is required:
Technique 1: How to Adjust a Brake Pad on a Bike
- Step 1: Before you make any changes, check the current state of your brake pads. Pull the lever on the bike and hold out the front tire towards the wheels. If you notice your brake pads are worn to the “wear-line” that is indicated on most pads, you have to immediately replace them.
If the wear lines on your brake pads aren’t indicated, you should maintain them yourself by making grooves on the pads.
If you absolutely need new brake pads, they can be ordered online or picked up at your local bike store. You also have to make sure your wheel is properly positioned in the dropouts. If it is not, your brakes will not make contact and not work at all.
- Step 2: Squeeze your brakes to see exactly where the pads are making contact with the rim. Both of your brake pads should make direct contact. Ideally, the pads should come into contact at the center, leaving a gap between the pad and the tire.
If the pads that connect to the rim are too detached or tightly knotted, they will damage the bike’s rubber in the long run.
You should come to eye level with the brake pads as you pull the lever. This is to test whether your bike’s quick-release mechanism is loose or just plain broken. The brakes will simply not function if the mechanism is not securely attached.
- Step 3: The next step is to release the nuts that hold the brake pads in place through an allen wrench. You want to use the wrench counterclockwise to loosen the bolts. If you do not properly unscrew all of the nuts, your brake pads could completely detach from the brake pad holder.
- Step 4: The brake pads, when in the holder, can be adjusted up and down based on your needs. This can only be done when the bolts have been removed. If they were too close to the rim, you could raise them to a reasonable distance, or lower them till they are centered if they were too high.
- Step 5: Once you’re done, tighten the pad bolts again. Continue counterclockwise spinning the Allen wrench until all bolts are snugly fit. Take one final glance to check whether the brake pads are properly aligned, and then make any required adjustments.
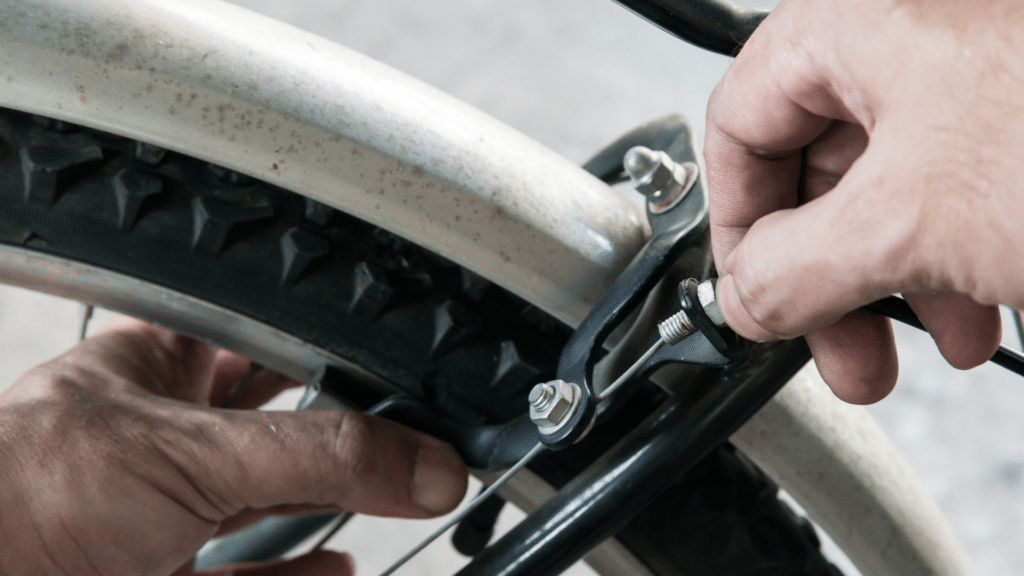
Alternative Method: How to Tighten Cable Brakes on a Bike
- Step 1: You want to start by checking the tightness of each brake lever. They should be about 1½ inches away from the side grip of your bike’s handlebars. If the levers come in contact with the handlebars when you pull them, the brake cables may be too loose.
- Step 2: If you want to make any changes to the brake wires, you start by loosening the barrel adjusters. These are located where the brake wires make contact with the brake levers. When you’re done, the brake cable by turning the barrel adjuster counterclockwise.
Remember, the looser the barrel adjuster the tighter the brake cable.
To see whether the brakes are adjusted, loosen the barrel adjustment yet again and pull on the brake lever. If the brake cable is still too loose, the caliper still needs to be adjusted. At this point, you should leave the barrel adjuster in its current position. It should not be tightened.
- Step 3: There is a bolt connecting the brake cable to the caliper, which should be removed. The caliper can be thought of as the ‘mainframe’ of the brakes upon which the brake pads are mounted. The braking cable is the short cable that attaches the caliper to the wheel. You need to locate the bolt that is keeping the brake wire in place.
Using an Allen wrench, turn it clockwise until it begins to loosen. Do not rush this, you simply need to remove the bolt just halfway. Spin the Allen wrench counterclockwise twice until the bolt is out.
- Step 4: Gradually pull the brake cable in order to tighten it. It should be relatively simple to pull the cable once the bolt has been loosened. Once you’ve stretched the wire as tight as it gets with your hands, secure it in place.
It is worth noting that while you are pulling on the cable, you should tighten the brake pads on the rim of your front tire. They should be fastened enough to offer minimal resistance as you move the tire, but not so tight that the tire cannot make any revolutions.
- Step 5: The next step is to re-tighten the bolt that connects the brake wire to the caliper. Spin the Allen wrench twice clockwise until it stops rotating. The cable should stay in place after the bolt has been tightened.
- Step 6: The barrel adjusters on the handlebars should also be re-tightened. By tightening the barrel adjusters, the brake pads will be free from the front tire. After tightening the barrel adjusters, your brake wires should be in workable condition. To inspect the brake cables, repeat the very first step we did.
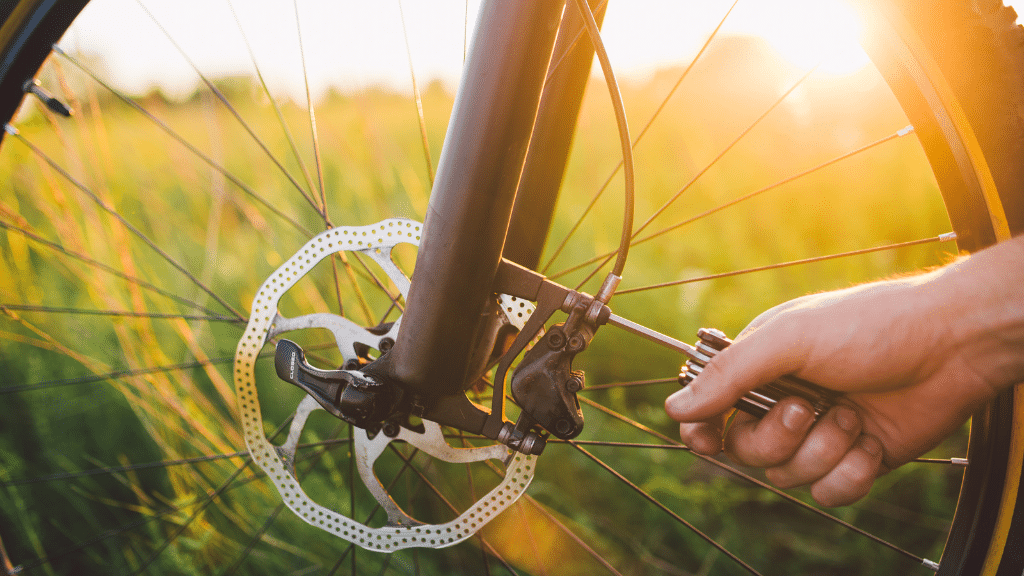
Alternative: How to Adjust Disc Brakes on a Bike
- Step 1: For this to work, you need to position your bike such that the wheels are off-ground and can rotate freely. You can use a bike stand for this. If you don’t have a bike stand, just flip your bike over so the wheels are standing up and the seat and handlebars are horizontally on the ground.
- Step 2: You need to know what kind of disc brakes you have. Check the caliper at the center of each of your wheels very carefully. The short cable that connects to the calipers on the bike is only found on mechanical brakes. Hydraulic brakes have no wires connecting them.
If you still do not know what brakes you have on your bike, photograph them and check in with your local bike shop.
The rotor is tightly placed between the caliper, which is approximately 3 inches long. A caliper is a mechanical device that applies pressure onto the rotor and decelerates your bicycle.
- Step 3: When you’re adjusting the brakes, tighten the wheel in the drop position. A bike’s drop house is what we call the y-shaped frame that the wheel is placed in the center of. The drop house is supposed to be mounted to the bike on both sides of the wheel.
You have to ensure that the wheel is firmly attached by moving the lever on the side of the wheel. Then fold the lever inwards until it is flush tight with the wheel. For older bike variants, you have to manually tighten the wheel in the drop housing by rotating an allen wrench clockwise.
- Step 4: One security caution to take is to stay away from the edge of the rotor or you’ll get cuts. The rotor is often fairly sharp around the edges. If you want to grip the disc, put your thumb and fingers on its two flat sides. If you end up grazing yourself, sanitize the wound immediately and get it checked up.

Alternative: How to adjust Hydraulic Brakes on a Bike
- Step 1: There are two nuts on the sides of your caliper. Adjust them If you find your brakes rubbing and making a screeching sound. The sound is a sign that your brakes are too tight. By glancing at the caliper, find the ⅛ inch attachment hex bolts.
Using an equivalent-sized allen wrench, spin it counterclockwise halfway. This should make your brakes stop rubbing against each other.
Worth noting it is also possible that only one wheel has tighter disc brakes, in which case you don’t need to tighten your other wheel at all.
- Step 2: To make sure the caliper is center aligned on the rotor, pull your brake lever. After you’re done releasing the two attachment hex bolts halfway, pull the brake lever that is linked to the wheel you’re changing. This will re-center it on the rotor disc.
At the last squeeze, hold onto the brake lever. The usual arrangement is that the left-hand brake lever controls the front brake, while the right-hand brake lever controls the back brake.
- Step 3: Tighten your earlier half-turned bolts before you release the lever. Place the Allen wrench into one of the two attachment bolts and take a half-turn clockwise to turn the caliper while you’re holding onto the lever. When you’re done, tighten the second pair of hex bolts as well.
If you are working on two wheels at once, you’ll need a friend to hold onto the levers while you’re working the brakes.
- Step 4: Give the wheels one more spin to see whether the rubbing and the screeching sound has stopped. The wheel should be easy to turn without much friction no matter how firmly you spin them, and there should be no audible sounds. When the disc brakes no longer rub, you know they’ve been properly set.
- Step 5: If the screeching sound is still there, place the caliper right over the rotor. If the brakes are still rubbing, loosen the bolts by a quarter-turn. Orient the caliper so that it is angled right above the rotor.
Place the brake caliper on its center while placing pressure on the brake pedal. Then, tighten the attachment hex bolts by a quarter-turn yet again. You now need to inspect the brakes once again by spinning the wheel and checking for the same screeching sound.
After the bolts are tightened, the bike brakes should be fully adjusted and ready for rides.
Bottom Line
While there are no laws requiring riders to know how to change bicycle brakes, every cyclist should be aware of bike adjustments for the benefit of safe riding and boosting bike performance. Although it may appear difficult in the first instance, changing a bike’s brakes is relatively straightforward.
Cyclists are generally needed to make changes to their brake pads and brake wires. We’ve broken down everything you need to understand for changing your bike brakes step by step, and we are hoping it will make your future bicycle trips simpler!