This post may contain affiliate links. If you click an affiliate link and make a purchase, I may earn a commission. Also, as an Amazon Associate, I earn from qualifying purchases.--
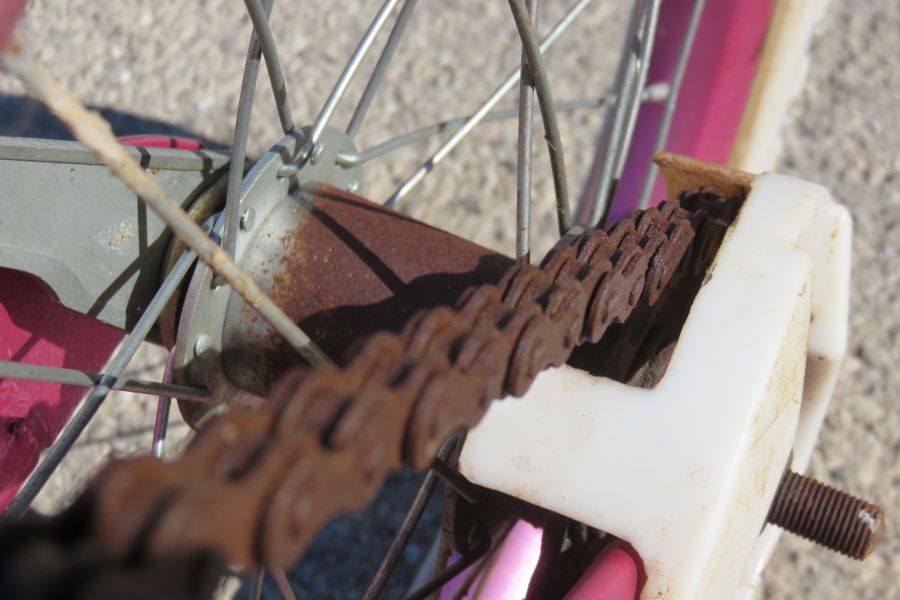
There are a lot of frustrating aspects to bike maintenance. Probably the most common and annoying occurrence would have to be rusting chains. Right?
Nevertheless, rusting is still an inevitable process. So, if you’re looking for a quick fix to this nuisance, you’ve come to the right place.
In today’s post, I will walk you through the 9 simple steps to take to remove rust from a bike chain using my secret ingredient…vinegar!
To get the absolute best results, I start using vinegar, but I also use a few cheap and readily-found liquids to help the process along. (More about these later)
Keep on reading to find out the full secret system!
9 Simple Steps to Removing Rust From A Bike Chain
Step 1: Examining the Chain
Before solving any problem, you have to first evaluate the situation.
In this case, I recommend laying your bike upside-down or on a bike rack.
This is because there’s no chance your kickstand can keep the bike stable enough for any rust removal, so they’re just a lot more secure on their back.
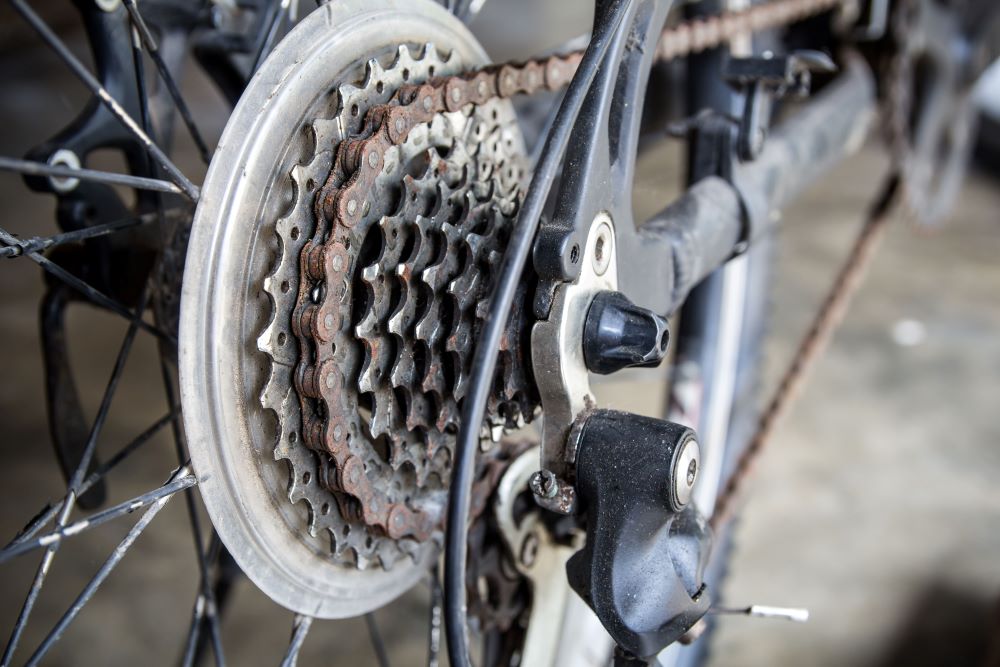
Now, with your bike face down, begin to take a closer look at your chains. You should be looking out for metal imperfections, forms of deterioration, or warping.
If they end up being too rusty, they might be beyond the point of repair. In that case, a quick chain replacement would be your simplest and safest bet.
On the other hand, if it’s just surface build-up, crustiness, or rust, you’re in luck. You can go forward with the rust removal process.
Step 2: Finding the Master Link and/or Removing the Chain
Master links aren’t really applicable to all bikes. However, most modern chains come with a master link that makes it easier to remove the chain.
You can find this linkage by examining the chain for specific pinholes or slot connections.
These allow for a pin to snuggle into the slot of the connecting chain to open it.
That being said, it’s worth noting that most single-speed bikes don’t come with a master link. And usually, its presence is simply random.
As a rule of thumb, if your bike doesn’t have a clearly visible master link, chances are that it’s just not there.
Instead, you’d have to get your hands dirty and pull out the chain manually. You can do this by jumping a link of a gear spike, which would result in the rest of the chain coming off with ease.
Step 3: Surface Cleaning
With everything out of the way, it’s time to start cleaning!
While using vinegar, I suggest getting some plastic gloves and a spray bottle.
You would need to add some vinegar into the spray- the amount depends on how big and rusty your bike is.
Be sure to aim at only the rusty spots. And then try going in later with a toothbrush to further scrub away at the rust.
If you still don’t see any rust coming out, try spraying more solution and scrubbing harder- you just need to be patient.
Step 4: Additional Cleansing
If the rust still isn’t flaking, it’s about time you bring in the big guns- adding a small amount of baking soda can drastically increase the spray’s effectiveness. It helps create a much stronger solution.
Yet with that being said, baking soda is a force to be reckoned with. Too much can result in your whole bike corroding away, so remember to proceed with caution!
Step 5: Soaking the Chain
After cleaning, it’s crucial to soak chains in heavy grime, followed by a degreaser for at least 20 minutes. Afterward, you should rinse the chains again, but this time with hot water.
For degreasers in this step, I urge you to wear latex gloves since most degreasers can be harmful to the skin.
And, if the rust build-up is too high or too thick, you should opt to soak it for over 24 hours to give the degreasers plenty of time to act on the rust.
Step 6: Metal Wool Scrubbing with Some Lime Water
As a finishing touch, you may even want to scrub the light rust away with steel wool that’s soaked in lemon juice.
This final technique can be rough on the hands, so be sure to keep your latex gloves on throughout!
On the same note, if the rust you’re scrubbing has already neutralized, there’s a good chance it could gunk up your steel wool.
If you come across this, you shouldn’t worry, just rinse it in hot water and reapply some lime juice to continue scrubbing.
After breaking up large amounts of rust at a time, wipe the surface down regularly. This would give a clearer view of any leftover rust on the surface.
Step 7: WD-40 as a Last Resort
As an end-all solution, you can choose to use WD-40 to finally get rid of any pesky leftover rust.
You use it to lubricate the surface while clearing up any rust. This helps loosen the rust or grime for easier scrubbing.
After its use, lube the chain again with some classic chain lube or oil. You need to remember that WD-40 is primarily a cleaning agent and not a lubricant, so this step is particularly crucial.
Step 8: Putting the Chain Back On
Depending on the bike and chain you have, the steps to this process could vary. If it’s a bike with no master link, you’d have to precariously thread one end of the chain to the drivetrain.
You’d have to do this to meet the opposite end of the top or bottom midpoints of the wheel.
When dealing with master links, you have to use your fingers to really get in there and bring the ends of the chain together.
They should meet at the midpoint of the wheels, and the process is relatively easy; you only need to slide the pin end-link into the slot of the opposing end-link after you’re done.
If this ends up being a struggle, I recommend checking Youtube or a keyword search of your bike’s manual online. You’re bound to find some generous stranger willing to help you out for free!
Step 9: Finishing Touches
With everything said and done, it’s about time you start wrapping up.
If you haven’t already, this would be an ideal time to clean and lubricate your chain. You can use a bike chain lube for this purpose. And, for a nice glisten, you can even apply polish.
This bike chain lube would protect your bike from any future rusting, so this process doesn’t become more common. Plus, it gives your bicycles needed protection against harmful elements, such as grime, dirt, etc.
Alternative Cleaning Materials
Though vinegar may be a great cleaning material, it’s not the most efficient. So, the following are a couple of alternatives you may want to check out instead.
Chemical Rust Remover
Chemical rust removers work as an easy solution to all of your rusting problems. Frequent bike riders keep them around as a handy tool for taking care of your bike. They can be found in almost any hardware store.
That being said, chemical rust removers can be pretty aggressive with their approach. Wearing protective gear for your skin and eyes is a must.
You should also keep a brush and cloth ready. This way, you could just spray the rust remover onto the chain and clean off the excess rust with a brush.
There shouldn’t be any problems if you apply enough pressure and are consistent with brushes. But, in the case the rust is still stubborn, you should just repeat the process and apply more pressure when brushing.
After the recommended time has elapsed, you should wipe off the rust remover with a cleaning cloth. Just to be double sure, rinse your bicycle thoroughly with warm water and leave it out to dry completely.
It’s crucial to note that chemical rust remover should not mix with baking soda, vinegar, citric acid, or other cleaning agents.
These could create much deadlier mixtures. In addition, you must not use the remover in confined spaces. At the very least, you should open windows or doors for ventilation. And, if you feel any sense of dizziness, leave the room immediately.
WD-40
I kind of implied earlier that WD-40 should be a last resort if vinegar doesn’t work. However, that’s not necessarily true.
If needed, WD-40 alone could do the job just as well. But it’s more of a multi-purpose chemical that happens to work for rust removal too.
Although, as stated earlier, it’s not an efficient lubricant- it’s only a cleaning agent. After using it, it’s vital to lubricate your chain for a swifter cycling motion.
Rust Prevention
Knowing the trouble it takes to remove rust, prevention against future rusting doesn’t sound like a bad idea.
So, if you’re looking for maintenance tips, I’ve noted a few steps that’d help keep your bike rust-free for a long time.
Drying Your Bike after a Day Out In the Rain
We all understand the euphoric feeling of bicycling during the rainy season. However, it is important to clean it with a rag afterward.
Keeping your bike dry can avoid most, if not all, rusting problems.
In particular, you should show specific consideration to moving parts like brakes, chains, etc.
Storing Your Bike Inside
When your bicycle’s not in use, storing it indoors is always the safest alternative. In particular, a shed or garage would work fine. The important part is to keep your bike away from rainwater or intense humidity.
Beware of Sweat
Amongst the dozens of things that could harm your bike, even your own sweat could cause rust.
Especially if you’re replacing the chains of an indoor exercise cycle, you’re bound to find plenty of rust if you don’t take care of the bike.
A solid solution to this problem is to just place a towel over the bike’s body area. This is enough for keeping the sweat off your bike.
As a further precaution, you could also use a dry towel to wipe any excess sweat that sticks to your bike.
Frequent Oiling
All professional cyclists lubricate their bikes at least twice a week.
With oil, you’re essentially providing an exterior shield against harmful elements. It ensures that all components are sufficiently protected and are capable of near-frictionless motion.
As a final touch, you should also wipe down the bike with a rag; don’t worry, there’d still be enough oil afterward to protect your bike!
Frequently Asked Questions
Is scrubbing necessary?
It really kind of depends on the size of your bike and the amount of rust that has built up. I recommend soaking your chain in a vinegar bath for about 12 to 24 hours. If there’s still a lot of rust leftover, scrubbing would be the easiest way to get the job done.
Can I use coke to remove rust?
Not many people know this, but yes, you can use coke to eat away at rust. It’s almost just as effective as vinegar. You only need to leave any rusty object submerged in coke for at least an hour, followed by a thorough scrubbing. This would loosen the rust just like any other cleaning agent.
Would vinegar corrode my bike? How could I prevent that?
In short, yes. Vinegar can corrode your bike’s metal. However, this only occurs if you don’t thoroughly wash your bicycle after using vinegar. If you want to prevent it, cleaning your bike with water would get rid of this issue with ease.
Final thoughts
At the end of it, rust is inevitable. Regardless of how pristine you keep your bike, the pesky red dust is bound to sneak up on you somehow. By working on your bike constantly, you’re developing your bike’s durability and encouraging smoother future rides.
On the same note, a bike cover wouldn’t be a bad idea either. It works great at protecting your bike from moisture and dirt while it’s in storage.
Not to mention, it practically guarantees that your bike always gives a smooth and favorable riding experience.
I hope this article helps prolong your bike’s lifespan so you can continue having plenty of smooth rides with your riding partner. Remember, a clean chain means a faster bike!