This post may contain affiliate links. If you click an affiliate link and make a purchase, I may earn a commission. Also, as an Amazon Associate, I earn from qualifying purchases.--
You’re in a rush to pump your tire, and the pump is not working or the gauge that’s been working fine (since forever!) just keeps on showing zero whatever you do? We’ve all been there!
There are lots of common reasons why your bike pump might not be working or showing any pressure, including:
The bike pump is not attached, the air is not being pumped, some gauge issues, the nozzle is detached, or there might be holes in the air hose.
Bicycle pumps may fail and break, but before you toss your pump in the garbage, consider the expense of replacing its components.
With basic self-diagnosis and standard tools, you can repair your pump if the necessary components are accessible. In this post, I will discuss the 6 most common reasons that your bike pump may not be working or showing no pressure, and then – crucially – how to fix these issues! Let’s get into this…

6 Reasons Why Your Bike Pump is Not Working Or Showing Pressure
1. Bike Pump is not Attached
The improper attachment of your bicycle pump is a regular issue (source). You may have attached the nozzle to the valve only to have it slip off when you begin pumping.
Here’s what may be occurring:
A bolt system is installed inside the nozzle to guarantee that the nozzle is secured to the valve.
When the handle is pushed to lock the nozzle of the bicycle pump to the tire’s valve, the bolt twists and locks everything in place. If the link between your bicycle pump and tire valves is not snug or if the screw has been damaged, the pumps will not lock on correctly, resulting in difficulty inflating the tire.
This may be problematic for both Schrader and Presta bicycle valves, as these are the most common ones available for most bikes.
Solution
The handle on the nozzle of your bicycle pump ensures that it is securely attached to the tire’s valve.
Knowing how and when to utilize the handle on your pump is the first step.
Start with the mechanism “unlocked,” which often means the handle will be pointing downwards. Install the nozzle over the tire’s valve next. After securing it, rotate the handle such that it is level with the floor. This should secure the nozzle’s position.
If you own a Presta nozzle, there is a little, unscrewable tip.
Before attaching the bike pump nozzle, this tip must be loosened; check to verify whether you have completed this step. Whenever the tip is removed and the valve is pressed softly, air should escape when the valve is pressed.
If the head is still not attached, there may be a problem with the nozzle of your bicycle pump. When the lever is engaged, a tiny bolt located within the pump’s nozzle rotates and secures everything in position.
If your nozzle’s screw is damaged, you might need to purchase a new one.
Many pumps and valves include directional vertical lines; to verify that the nut has been properly secured, align the perpendicular line on the tire valves with the diagonal axis on the pumping nozzle.
After ensuring that the valve is ready, attach the bike pump with care.
Try pushing the nozzle’s lever up repeatedly, and check for the latching to occur. This ought to resolve the issue.
The form you have selected does not exist.
2. No Air is Being Pumped
The failure of a bicycle pump to inflate a tire can be irritating. You may find yourself pumping repeatedly with no obvious indication that air is entering the tire.
Alternatively, you will hear air whistling out as soon as you push the pump.
This situation is related to the last one; however, it differs in that it is likely not the latching mechanism but rather the connection that is faulty.
In other words, better contact between both the pump as well as the tire is likely all that is required.
Solution
It may suffice to disconnect the pump and reattach it to the valve to confirm that the valve is properly attached. This has been the most prevalent issue I have seen while utilizing bike pumps.
In addition, I find it helps to utilize both arms to ensure that the pump is seated securely. If issues persist, try pushing slightly harder before locking the pumping head in place. Then, ensure that both the nozzle as well as the valves are in a straight position.
If the pump is attached at an angle, it might be difficult to properly inflate the tires.
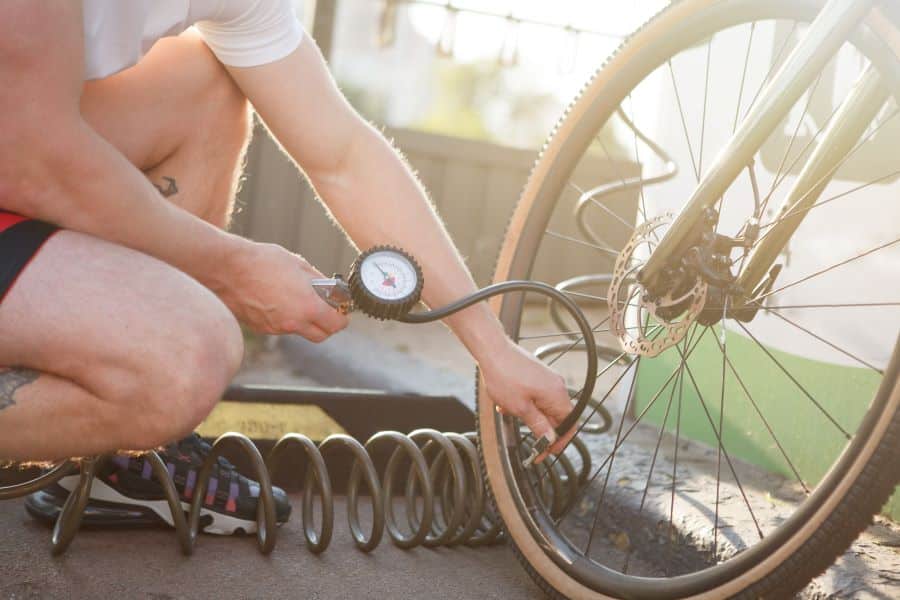
3. Gauge Issues
The indicator on your bicycle pump guarantees that your tires are at the correct pressure. If you understand the tire’s PSI and it corresponds with the gauge, you are fine to go.
However, difficulties may emerge with the built-in gauge on your bicycle pump.
If your gauge is not displaying a pressure reading, there may be a leak between the hose of your bicycle pump and the tire valve.
The gauge would only display a reading if the pressure in the pipe is allowed to develop and remain constant. This procedure will be compromised by a leak.
Solution
Check your bicycle pump hose for punctures before attempting to solve the problem.
If there are no obvious punctures, try immersing the bike pump line in the water. If you see bubbling, you have a leakage.
Also, ensure that the nozzle is properly attached to the tire valve. Oftentimes, this is the quickest and simplest solution to most bicycle pump problems.
If you determine that there are no leaks in your bicycle pump line and that you are attaching the nozzle to the tire valve appropriately, you may have to change the meter. The meter on a bicycle pump is simply removable and replaceable.
The gauge is attached to the bicycle pump through a threaded lock mechanism, which may have worn out over time.
4. Bike Pump Not Moving Downwards
If you are attempting to press the lever on your bike pump and it is not lowering, the following is occurring:
You may have overlooked opening the Presta valve cap. If the top piece has not been loosened, no airflow will be permitted to flow, resulting in a pressurized bike pump tube that is difficult to depress. Alternatively, the nozzle may not establish a smooth connection with the tire’s valve.
Both of these issues will block air from escaping your pump, so each time you push the pump handle, it will seem like you are struggling against a mass of pressured air, and you will not be able to maneuver the pump.
Solution
Begin by releasing the valve’s mouth.
Ensure that the contact between both the pump nozzle as well as the valve is secure. To enable air to enter the system, the valve’s pin must be depressed precisely.
If it does not resolve the issue, check the tire valve. Frequently, the valve, not the pump, gets blocked or clogged.
Try gently moving the valve back and forth or softly depressing the valve. If you hear a burst of air flowing out, then the device is functioning correctly.
5. The Nozzle Won’t Stay Attached to the Pump
If you set the pumping nozzle just on the tire valve and it immediately falls off, it could become aggravating.
Here’s what may be happening: Either the handle on the bicycle pump nozzle isn’t in the right position, or perhaps the pumping nozzle is wearing down.
Solution
Set the nozzle of the bicycle pump onto the tire’s valves. At this point, the handle on the pumping nozzle should be in the down position.
After positioning the nozzle above the valve, bring the lever parallel to the floor by inverting it. This will ensure the nozzle is securely attached to the valve.
If the pump still will not engage, here are some other typical solutions.
Closely inspect your pump’s nozzle. Some nozzles feature tension-adjusting rings on the tip of their heads.
If the ring is correctly tightened, there will be sufficient strain to keep it linked to the valve. Ensure that the ring is appropriately tightened.
In addition, there is also a rubber portion within the nozzle’s head that, over time, might wear down and become useless at gripping the tire’s valve.
If possible, detach the nozzle’s head and inspect the rubber piece. This issue may be resolved by replacing this part.
6. Pump Not Detaching Without Losing Air
We all have been there; we have just completed perfectly filling a bicycle tire, and when attempting to remove the nozzle, we hear air coming out.
It is normal to lose a small amount of air while withdrawing the pump nozzle from the tire valve.
If it does not need you to re-inflate your tires; it is alright.
When a substantial quantity of air is released when withdrawing the tip from the valve, this issue often ends up arising. If you need to re-inflate your tire, there has been a considerable loss of air. This is irritating since you have just inflated your tire!
Solution
Occasionally, when you notice air escaping during the removal of a bicycle pump, it is flowing from the pump and not from the tire.
After removing the nozzle, verify that your tires are still adequately inflated or you need to re-inflate them.
While removing the nozzle from a bicycle pump, quick, deliberate motions might assist in reducing the quantity of air wasted. Remember that when pushing airflow in, the nozzle’s handle should be in line with the ground.
Once the tire has been fully inflated, restore the lever to its original “unlocked” position.
Here, prompt intervention is optimal. Pull the nozzle straight up to release it from within the valve.
If the nozzle is difficult to remove, you may have to jiggle it back and forth gently.
A Few Additional Tips
1. Apply Grease to the Seal Before Using the Pump.
The plunger serves as the seal while inflating tires. It immediately supplies air to the tire.
You must oil the bicycle pump’s plunger for it to function correctly. If it remains dry for an extended period, it will be difficult to use the pump.
Similarly, if the primary seal of your bicycle is dry, you may encounter some resistance while using it due to the rubber’s grittiness and you’ll notice a scraping sound.
It is recommended practice to periodically inspect the primary seal.
If the surface is dry, then spray it with an appropriate lubricant. Some lubricant sprays on the market are ideal for lubricating your bike pump’s main seal, plunger, and other components. I suggest selecting one that is water-resistant, as it will perform well in all situations and avoid corrosion.
2. Inspect The Air Hose for Tiny Holes
If the hose is damaged and contains cuts or cracks, it will not inflate the tire and therefore will create leakages. It is advisable to change the tubing as soon as holes are discovered.
Micro-damage to the air hose is a regular occurrence while using a bicycle pump for the first time; therefore this problem might easily emerge.
The simplest approach to repair a damaged hose is to snip off the damaged end of it and afterward bind it firmly with thread or a rubber stopper.
The hose may then be reconnected in the same manner as previously. Grab the aerator and place it in a water-filled bucket to detect microscopic holes that are not easily noticeable.
If you notice bubbling coming from a single location, you have located the leak. Alternatively, you may use an old, undamaged hose as a substitute, but only if it is in good condition.
I also found this video to be a good resource for additional tips for fixing the issue of your bike pump not working or not showing pressure:
Final Thoughts
As indicated in the introduction, air leakage is the most prevalent cause of a non-functioning bicycle pump.
In addition, various components may need maintenance and modifications. You have also learned how to spot problems and replace the required components of your bicycle pump.
Implement these solutions depending on the nature of the issue anytime your bicycle pump is malfunctioning.
Although it is feasible to repair a bicycle pump without having to replace it, it is often impracticable and not worth the trouble to replace some components.
If you are unable to diagnose the problem on your own, then you might want to consider purchasing a new unit; just like everything else, pumps will eventually need to be replaced.