This post may contain affiliate links. If you click an affiliate link and make a purchase, I may earn a commission. Also, as an Amazon Associate, I earn from qualifying purchases.--
I was inspired to write this article after hearing a bit of a horror story! A woman who was seriously on the shorter side bought a Peloton bike only to find she couldn’t use it. It was too small!
Peloton bikes have weight and height limits, so you must know how tall your bike will be before you buy it! If you don’t understand how Peloton height limits work, you could end up with an uncomfortable experience which could even affect your ability to ride the bike in the first place.
Both the Peloton Tread and Tread+ can only accommodate users between the height range of 4’11” to 6′ 4″ (150 cm to 193 cm) and the weight range of 48 lbs. to 300 lbs. The Tread is not intended for users outside of this height and weight range.
Not only is there this strict height limit, but also there are lots of variations when it comes to how to set up your Peloton bike so you can optimize it for your height.
This article will explain everything you need to know about Peloton height limits so that you can make a smart purchase decision – and also get your bike set up right (if you get one!)
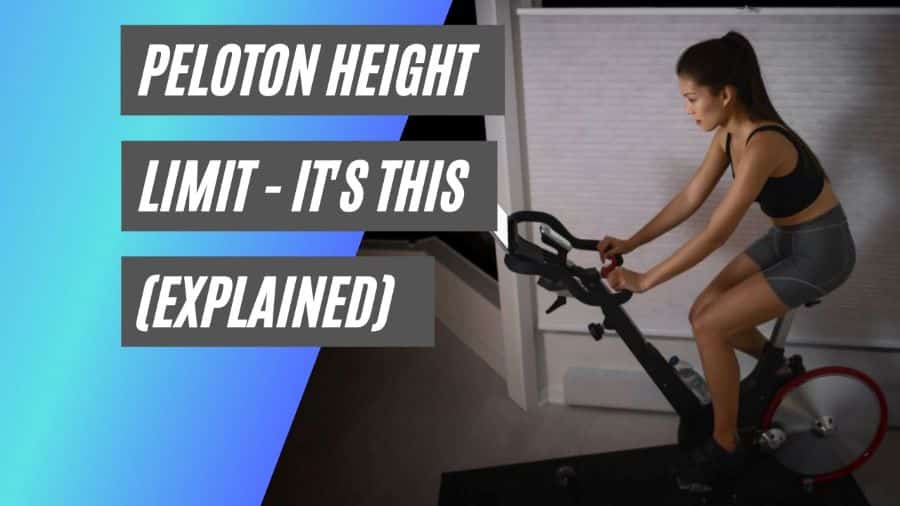
Peloton Height Limits
So yes it’s true. Peloton specifics that its main bikes are suitable for riders between the height of 4 foot 11 inches, and 6 feet 4. This is about 97% of the adult population. (Source)
There is also a weight range of 48lbs to 300lbs. This is approximately 98% of the population of the United States.
If you fall outside of this range, then you will, unfortunately, have to look for alternatives.
For those within this range, however, the process is not as simple as just buying a Peloton, and then you’re all good to go. It’s all about optimizing its different elements for your height and for the best riding experience. Here’s how to do it:
How to Adjust a Peloton Seat Height
You will have several options for changing the height of a Peloton.
Aside from that, the seat’s height and depth need to be modified to the user’s specifications.
It is important to change the height so that your backbone is not put under too much stress. The rider’s hips also need to be in proper alignment with the Bike.
Adjust the Height
Fasten the pedals to the Bike and extend one leg as far as it will go (the other leg is bent). Your foot should be in a flexed posture, and your bent leg should be nearly entirely straight (parallel to the floor).
You need a slight bend in your knee for safety reasons, as you will be riding. Now is a good time to make sure your knee isn’t bent too far.
Make sure your leg is not entirely straight and that there is a slight bend in the knee.
Adjust the Reach
The term “reach” refers to the horizontal distance between your saddle’s front and the bottom of the handlebars.
Adjusting your reach to your liking can greatly improve your level of ease. If it’s too close, you might feel cramped, which can cause hip and back pain.
When you climb, you’ll inevitably bang your knees against something. You can experience the same discomfort from reaching too far forward if you are too far away.
Peloton seat position can be assessed by bringing the seat forward until the rider’s hands touch the handlebars. This will get your body somewhere close to where it needs to be.
When the reach is right, you won’t have to adjust the Peloton saddle as much. Your knees won’t have to move out of the way of the handlebars when you pedal uphill.
When seated, your arms should be outstretched in front of you with a modest bend of 10 degrees at the elbows.
Adjust the Handlebars
The next step is to modify the height of the handlebars.
An effective and satisfying workout on an exercise bike depends on the machine’s handlebars being set up correctly.
First, ease the load on the Peloton cycle by decreasing the resistance. The next step is to pull the lever and raise the handlebars to a comfortable height.
What height should it be?
Well, you want your back to be about a 45-degree angle, so keep on adjusting until you think you’ve more or less got that boxed off.
Adjust the Depth
Next, adjust the depth of your seat. You can adjust the straps holding you in by turning the lever under your seat to the left.
When the lever touches your Light Weights, just slide it out of the way and down. Put the seat where you want it, then pull the lever tight.
If you’ve never done it before, it’s best to begin the process of adjusting the seat depth with the seat in its neutral middle position.
If you put your elbow on the nose of the seat and move it forward until your fingertips contact the handlebars, you have found a good beginning seat depth.
Once you’ve been on a few rides, you can always change the settings to make yourself more comfortable. (Source)
Here is Peloton’s official video outlining exactly how to adjust the depth and height for maximum effectiveness and comfort:
Factors to Consider when Adjusting Peloton Height
Be sure to Record Any Modifications
You must remember the original seat location. If a change you make doesn’t enhance the Bike’s feel and ride, simply reset it and try again.
New Positions don’t always feel Natural
It may take some time to adjust to a new saddle position on your Peloton.
If you try it out and it doesn’t feel right away, give it some time to settle in before you decide to make any drastic changes.
It’s best to wait until after a few rides before you consider making any more adjustments. After a few rides, you’ll notice that it doesn’t feel right, which is a strong indicator that something is off.
As an alternative, you could be in discomfort.
Adjust Torque Appropriately
Although Peloton does not specify a recommended tightness, it should not be so loosened that it wobbles. Alternatively, if you over-tighten it you may hear a cracking sound. Doing this would render the Bike useless, and you might have to replace the seat post.
You also don’t want to under-tighten, which might have its set of problems. The seat post and saddle will jiggle and shake when riding if the grips are too loose.
If it shifts about too much, it will also be dislodged from its current perch.
What to do after making Seat Adjustments?
After a few trial rides in the class, you can enter the adjustment data if you’ve settled on a comfortable riding posture.
You can then rapidly reset your Peloton to its original position if someone else uses it.
You can go on any Peloton and be ready to bike in minutes with only these three modifications.
If you’ve been doing a lot of hard Peloton power cycling, it’s a good idea to check these every so often to make sure they haven’t come loose.
Here is a four-step process to ensure you optimize your ride as best you can:
- To begin, secure your Bike’s clips. Get into the riding position by placing your hands on the handlebars and moving your right foot to the twelve o’clock position. It’s okay to bend your knee slightly. Put your seat lower if you can’t bend your knee comfortably. Raise your seat if you have to put too much bend in your knee while sitting.
- Check the depth of your seat to make sure it is comfortable. Start by putting your foot in the three o’clock position. The knee should be higher than the ball of the foot when in this position. It’s time to slide forward in your seat if your thigh is rubbing on the ball of your foot. You should recline your chair if your knee is in front of your foot. The second set of eyes from a close friend or family member can help ensure proper knee alignment.
- At this point, you can start pedaling on the Peloton now. You shouldn’t feel any discomfort while pedaling, and you don’t have to rock your hips, knees, or toes down at the bottom of the pedal stroke. If you find yourself extending your legs, try lowering your seat. Raise your seat back if you see your knees drifting out to the sides. If you’re noticing movement in your hips, your seat may be too high. If you’re bouncing back and forth while you pedal, try lowering your seat a little at a time.
- After settling on the ideal seat height, it’s time to double-check the position of the handlebars. It’s important to have a tiny bend in your arms and have your hands rest comfortably at the bottom of the handlebars. Try elevating the handlebars if you find yourself reaching or squinting. Feel free to adjust the height of the handlebars to suit your personal preferences and physical requirements.
What is the recommended Peloton Ceiling Height?
The height of the ceiling is much more important if you consider that your speed translates directly into sprinting upward at a higher rate. Treadmill workouts benefit from more headroom for more effective calorie burning.
Peloton suggests a ceiling height of at least 20 inches above the treadmill’s highest user.
Why is it important to have a good Peloton Ceiling Height?
If the ceiling is high enough, you can complete any exercise on a Peloton without having to adjust your form or intensity because of your height.
You shouldn’t have to stoop because the ceiling is too low. If you have more headroom, you can ride without worrying about knocking your head on the ceiling.
Recommended Ceiling Height vs. User Height
Here is a quick comparison between the ceiling height and the user height that is officially recommended by Peloton. (Source)
| Ceiling Height | User Height |
| Up to 7′ | Up to 5’2″ |
| 7′ to 7’6″ | Up to 5’7″ |
| 7’6″ to 8′ | Up to 6’1″ |
| 9′ | All heights |
Tips to make your Peloton Seat More Comfortable
If you feel that your Peloton seat height is not comfortable, then you can try to alter it according to the instructions mentioned above.
If you still feel that the ride is not as enjoyable to your liking, then here are a few additional tips to help you make your exercise as enjoyable as possible! With these tips, you’ll be ready to kill it at your next Peloton class!
Try Wearing Padded Cycling Shorts
Curious as to how the pros manage to stay so cool while putting in such long hours on their bikes?
Protective padding for cyclists’ legs. These are shorts that feature an internal padding system that may be velcroed in. The liner acts as a buffer between your butt’s delicate skin and the saddle’s harsh surface.
For riding exercise bikes, you can choose from form-fitting shorts or looser padded shorts, depending on your preference.
Padded Peloton Seat Covers
Instead of having padding sewn into cycling shorts or underwear, it can be put onto a seat cover for increased comfort.
The saddle cover can be secured on a Peloton saddle with a drawstring or hook-and-loop closure. They are easy to install on the bike and are a good option if you don’t enjoy wearing cushioning.
Since we all know that a Peloton workout can become very sweaty, they are also simple to remove and come in a wide variety of styles that can be washed.
Here’s a video showing how effective these seat covers can be:
Conclusion
If you find that the seat on your Peloton bike is too small or too narrow, you are not alone! Many cyclists, from newcomers to seasoned pros, find the Peloton saddle uncomfortable.
Can you think of a way to make riding the bike for exercise more fun?
Yes!
The good news is that there are many ways to improve your riding comfort, some of which require making minor adjustments to your bike’s specifications and others requiring the purchase of additional apparel or accessories. With a few tweaks here and there, you can ace your next Peloton session like a pro!