This post may contain affiliate links. If you click an affiliate link and make a purchase, I may earn a commission. Also, as an Amazon Associate, I earn from qualifying purchases.--
I’ve been doing my shopping by bicycle for several years now. I reckon it might be about ten years (without hopefully showing my age).
If you’re trying to load up your bike with groceries, then having no rack can be a real pain! Luckily, there is a range of other alternatives.
I’d like to think of myself as a bike-shopping pro these days, and I’ve tried just about every one of the methods below. I have some of my personal favorites – but the big thing is there are pros and cons to each!
In this guide, I’ll show you exactly what my favorite nine strategies are to help you transport groceries by bike without a rack. I’ll go through:
- The pros and cons of each
- Exactly why I like each one, and who it would be most suitable for

1. Backpack (Worn On Your Back)
This is probably the most obvious choice, and I imagine if I did a poll (spoiler – I haven’t!) then this would come out top as what people currently use.
It kind of makes sense.
Backpacks are so widespread and so easy to use – and lots of us have one just lying around the house.
Top tip – if you use a backpack for groceries (and I certainly have!) get some that straps at the front. Strap it around your belly or chest, to avoid any slipping backpack disasters as you are cycling.
Right, let’s take a look at the pros and cons:
Pros
This is a good solution for a light shop. You can fit I’d say somewhere between 15-30lbs of food.
A good rule of thumb I’ve heard for safety is that you should carry somewhere between 10% to 20% of your body weight. So if you weigh 150 lbs, then this gives you this nice 15 lbs to 30 lbs range.
This is a fair amount of groceries – nothing like the storage of some of the other methods, but still reasonably respectable.
Another pro is that you can load the bag straight from the cash register. This is a definitely big bonus!
Also, it’s very economic. Backpacks cost very little unless you get a really high-tech one – which probably isn’t really required for this use.
Cons
The biggest problem is definitely sweating! Buckets of sweat!
This is the sweatiest of the methods outlined in this post. It’s something to do with having the bag directly against your back and pressing against it. This will create a layer of sweat that gets imprinted on your clothes and will spread to some extent onto the bag.
If you’re OK with sweat, then this is no biggie! And if you’re not going to work then you might not be remotely bothered!
But just be warned! It’s a real sweat-bath.
Don’t believe me? Check out our video from Tyler on our youtube channel:
Another issue is potential back or neck strains or problems. When cycling, you ideally want your back to be as straight as possible (even if you’re leaning forward).
Backpacks naturally cause you to arch your back, and this is not good for back and neck muscles. This could even have a knock-on for other body parts, like your knees.
2. Back Pack (Tied To Bike)
If you use a backpack tied to the bike, then this can actually be an even better solution. This maintains all of the pros of a back-pack but reduces the impact of the cons.
You would normally be attaching your backpack behind the saddle with something like a rope or bungee cord.
Pros
Still the same pros: it’s easy to fill straight from the cash register, it’s cheap and good for a smaller shop. Also, there are fewer issues now with sweat or back problems – so everything is looking rosy on that front.
Cons
On the flip side, the main issue is the technical problem of attaching it to your bike.
Some bikes probably offer more options for securing the backpack behind the saddle than others. On some bikes, it might cause a safety problem, and be prone to slipping onto the wheel or falling off altogether.
This is especially true with heavy groceries.
3. Milk Crate
This is a brilliant one for all you DIY aficionados out there! I’ve done this one, and there are lots of merits I assure you.
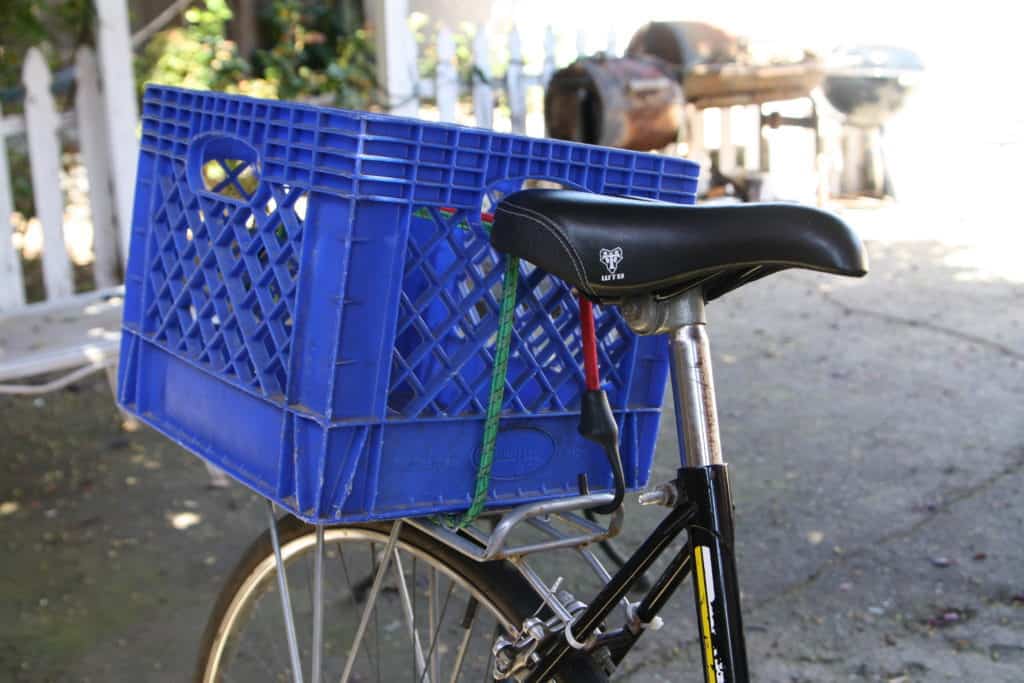
What’s the basic idea here? Well, you get a milk crate and attach it somehow to your bike. Using either bungee cords or zip ties is the standard way.
Here’s how it looked when I created one:

Pros
This is another really budget solution, probably the cheapest on this list. You can buy crates very cheaply – and you might even be able to find one for free if you have a source in local dairy or factory.
Then you just need some zip ties or bungee cord, and away you go. This will hold more groceries than a backpack, and there’s less chance of it slipping off or impacting the wheels.
Cons
There is a lengthy setup time involved with this (unless you’ve done it before).
Also, it is better suited to the mechanics and frame of some bikes rather than others.
All in all, though, there are lots of positives.
4. Pannier
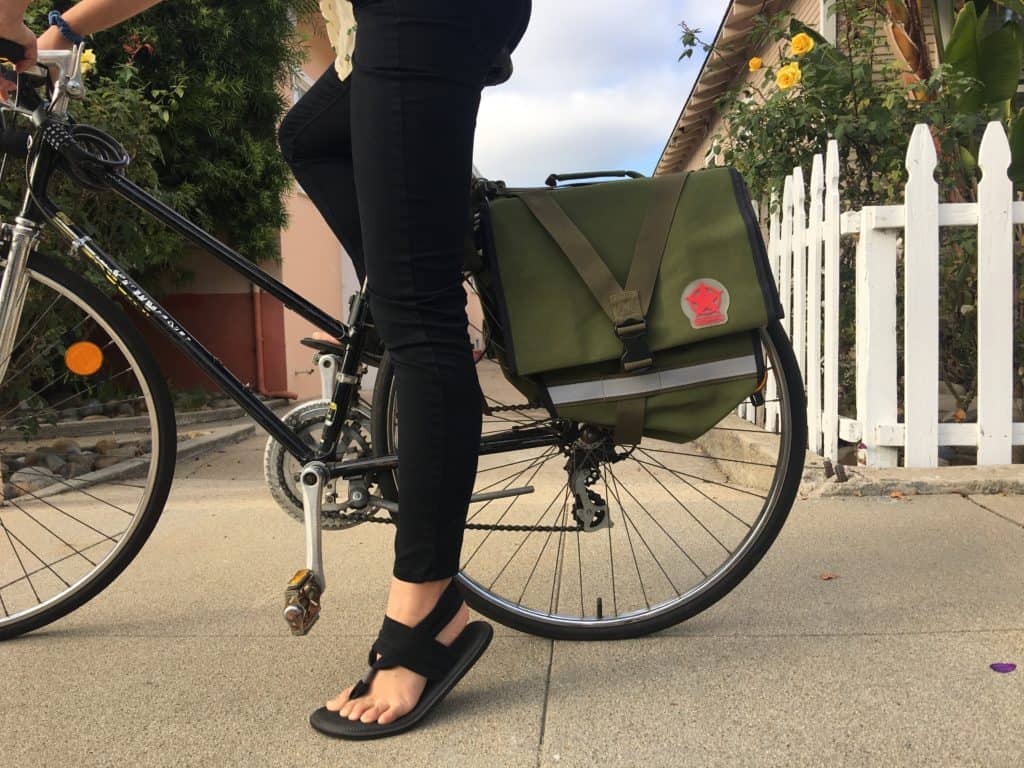
This is another really popular option off this list. Panniers are bags that attach simply and securely to your bicycle. Here’s one to take a look at:

Pros
Panniers can unclip, and so you can pack groceries into them at the checkout. They are easy to reattach to the bike.
You can even, potentially use them to carry things round when you’re not cycling, and a lot of people do this.
Because panniers are often fixed on one side of the wheel, you can use two – one on each side.
Cons
Panniers are often quite tall and narrow in design. This is good for making them aerodynamic to an extent. However, this means that if you have any wide or fat food, then it’s not going to fit!
If you’re looking for a pannier that I recommend, then take a look at this video from our Youtube channel about the Roswheel Expedition Pannier:
5. Use A Trailer
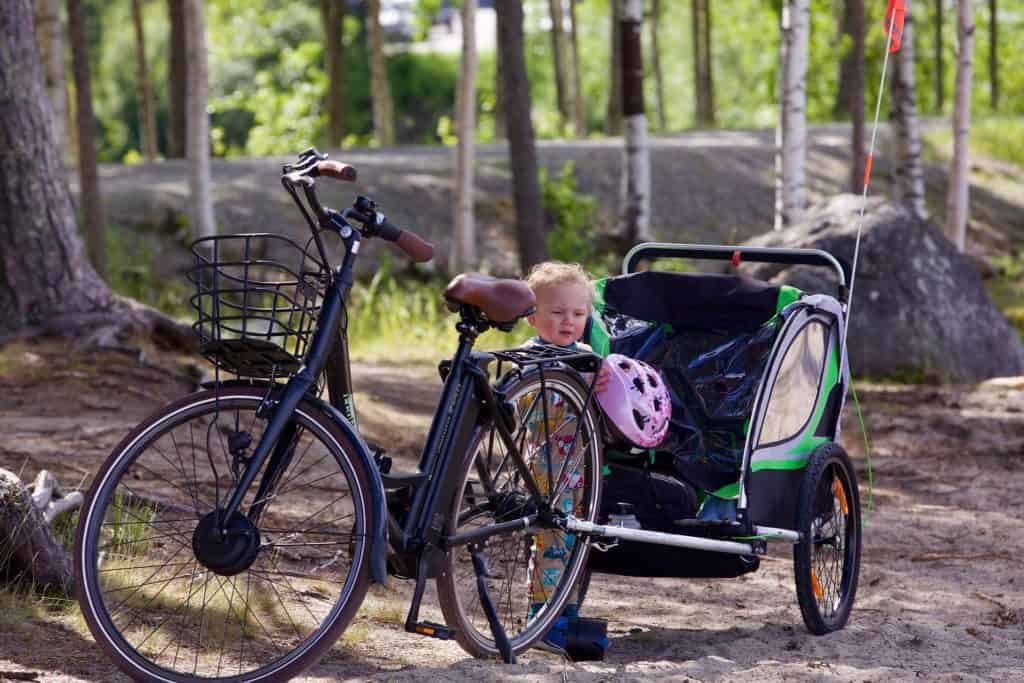
I’m sure you’ve either seen these or you have one anyway. They look like this:

Just remove the kid from the equation, and use the trailer to house your delicious groceries. Yum!
These are perfect for giant quantities of groceries and will hold the biggest weight and volume of anything on this list.
Pros
If you have a large amount of shopping to carry home, then a kid’s trailer is one of your best bets – because the amount of shopping it can carry is substantial.
Top tip – try to strap and velcro in the groceries as much as you can to avoid any of them falling out and causing nasty accidents on the route back.
Also, it’s nice to have a piece of equipment like this trailer that can double up its role! You can take the kids out in it one day, and go to the store the next.
Cons
This is the storage method that will slow you down the most. The trailer with groceries inside is a pretty hefty thing to have to tow
This requires a lot of extra effort, and you really can’t go very fast.
If you live a long way from the store, or if there is any difficult terrain like hills, then this might not be a viable option.
6. Bike Packing Bags On Frame
These smallish bags are designed to attach simply underneath the main bike frame.
Pros
Theses bags are certainly very simple to use. They clip simply onto the frame, and you could also walk round with them.
Cons
The big problem about these tends to be their size. They are the smallest bag on this list, and so the amount of groceries you could feasibly put into them is minimal. Think a few cans, and a packed of spaghetti kind of stuff.
7. Front Rack Pannier
These are similar to rear panniers, but are slightly less common I’d say.
Pros
Just like the rear pannier, they provide a secure and simple storage solution. You can fill them at the checkout, and you can also carry them round in your day to day life when you’re away from your bicycle.
Cons
You will need a rack of some sort to put this pannier onto. If you haven’t got one, then you can’t really use it (or you’d need to buy one).
Also, these front panniers tend to carry less than the rear ones. Also, you can often carry two rear panniers, but front panniers will be restricted to one.
8. Burley Travoy Trailer
These are a fantastic invention. It’s a kind of smallish trailer on wheels that you attach behind your bike, and pull it along on the ground behind you. It’s similar to the kids trailer, only smaller.
Pros
This is a much more aerodynamic option than the kids trailer. It’s much lighter to two behind a bicycle, making it easier to cycle with.
The trailer also doubles up as a hand cart, so you can walk with it round the store, loading up groceries.
This ticks loads of boxes, and is definitely a winner!
Cons
Amount of storagemight be a slight issue for some. These are big, but not as big as the kid’s trailer. They are much bigger than anything else on this list though, barring the kid’s trailer.
The only real issue for most people would be cost. They cost somewhere in the region of $300 – but imagine how much petrol you’d be saving doing your grocery shopping with this!
9. Get A Touring Bike For Grocery Shopping
If you don’t want to add a permanent rack to your normal bike, you might want to consider just getting one to go shopping with.
You could potentially get one second-hand to cut costs – and you’re only going to the store with it, not up Everest.
If you’re going to get a bike for this purpose, I would recommend a ‘touring bike’. They are literally designed to be laden with heavy bags – that is their raison d’etre.
Pros
Touring bikes are built for tourists, who cycle round with bags of belongings on their bikes. What could be a more perfect match for someone looking to bring groceries back from the store!
Cons
It can be annoying requiring to have two different bikes. If you’re a bit short on storage space, then a second bike is a big hassle.
Also, there is the unwanted expense of the whole thing. So much cheaper to have one bike!
Bonus Idea – Delivery Options
Hey, this is kind of a cheat! But why not just get the stuff delivered if that’s an option?
Pros
It’s completely hassle-free, and no zip-tying of milk crates or sweating on backpacks is required. (Phew!)
Cons
This is a cycling website, so I do normally try my best to promote cycling options. So forget you ever saw this one, guys.
Get on your bikes and bring that load home!
