This post may contain affiliate links. If you click an affiliate link and make a purchase, I may earn a commission. Also, as an Amazon Associate, I earn from qualifying purchases.--
Bike lift hoists are perfect for cyclists who live in smaller spaces. Whether you live in a tiny apartment or a home with a garage that is filled to the brim, having more space can be nice. A bicycle can only add to the problem as they’re not the easiest object to store.
Fortunately, a bike lift can not only make it easy for you to gain space in your home but also makes bike storage easy.
As an added benefit, bike hoist systems can be used to lift your bike out of the way quickly and also make it easy to get your bicycle when you’re ready for a ride. Tired of having to dig your bike out of the basement?
Perhaps a bike lift in the garage will make things easier!
Here is a list of the best bike lifts on the market (starting with my absolute two favorites):
Quick Table Of Recommendations
| Best Long-Term Investment Option (But Pricier) | Flat Bike Lift |
| Best Cheaper Bike Lift For Overall Quality | RAD Cycle Products Bike Lift Hoist |
| Best Bike Lift For Lighter Bikes | Racor Ceiling Mounted Bike Lift |
| Best Budget Option | Bike Lane Storage Hoist |
1. Best Long-Term Investment (Higher-End Purchase) – Flat-Bike-Lift
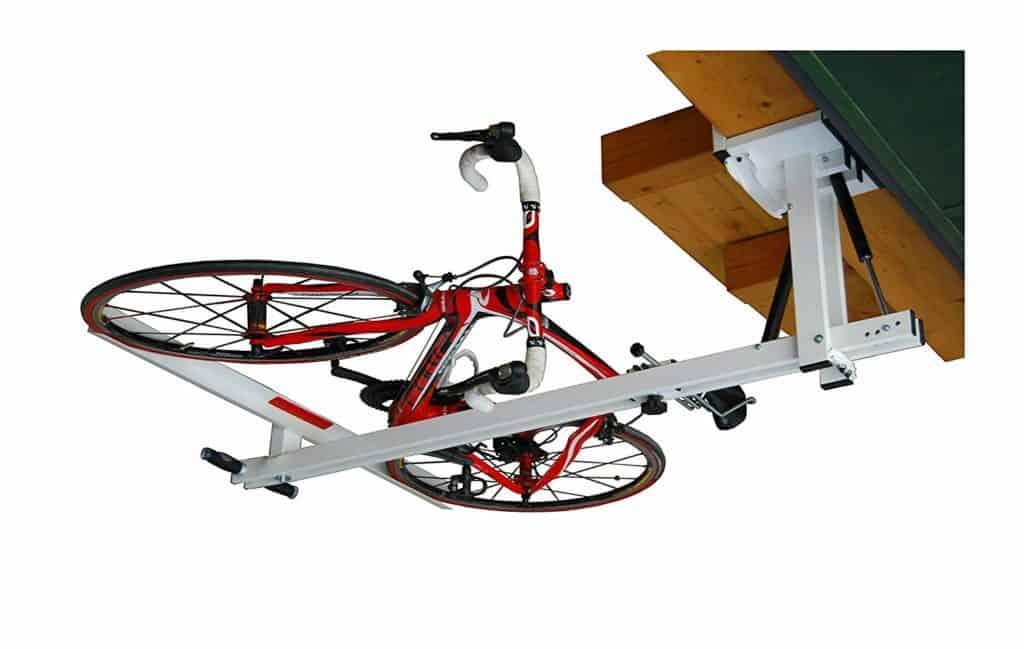
The Flat-Bike-Lift is quite simply the best bike lift on the market.
It is a completely different design compared to the other systems in this article. It utilizes a hydro-pneumatic lifting system that will take the bicycle from a horizontal position all the way to a position flat against the ceiling.
It’s designed to go up and down with minimum effort. In addition, when you pull down it’ll come down slowly to prevent any accident.
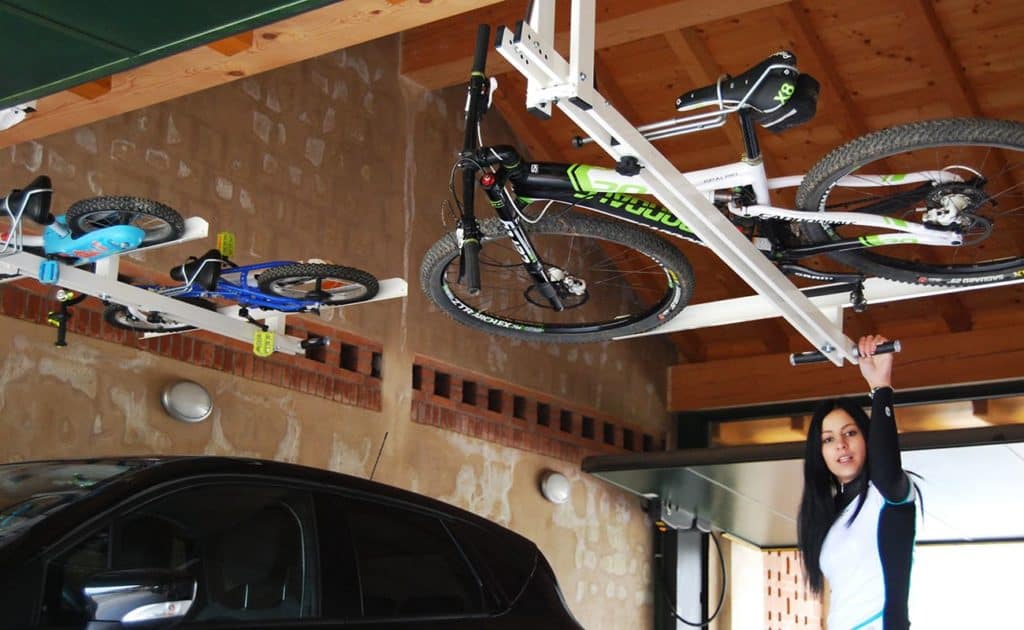
If you’re looking for this type of system the Flat-Bike-Lift is king. It truly is a product that does a great job of saving space inside your home.
It’s perfect for ceilings that are 8 to 8.5 ft. If you’ve got a higher ceiling contact their customer support, because you’ll need to buy an additional piece.
They are quick to help out their customers. This is a beautiful product that delivers.
One of the benefits compared to the pulley bike lift systems is that there is no rope. When the bicycle is being stored in the upright position it will be completely out of the way. This allows you to use the space underneath to park a vehicle or store other objects.
In addition, it is also easier to use than even the pulley system.
Yes, it’s more expensive. But it’s worth every dollar. I would consider this an investment, and the product is made to last.
If you’re moving homes you could uninstall it to bring to your new home.
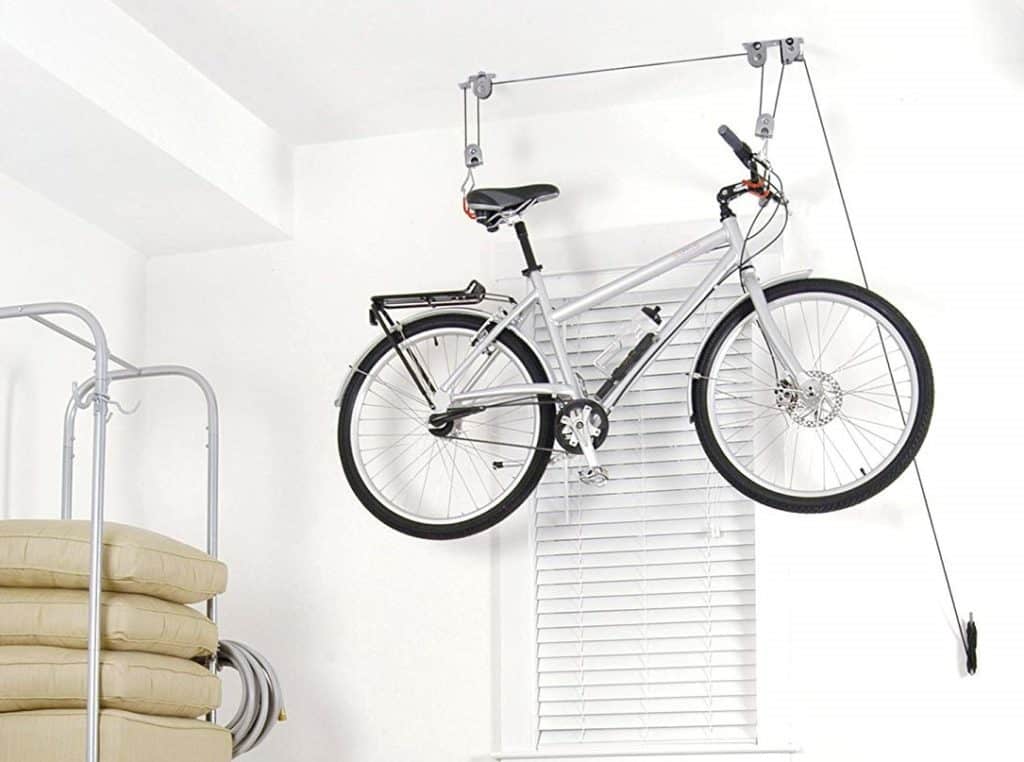
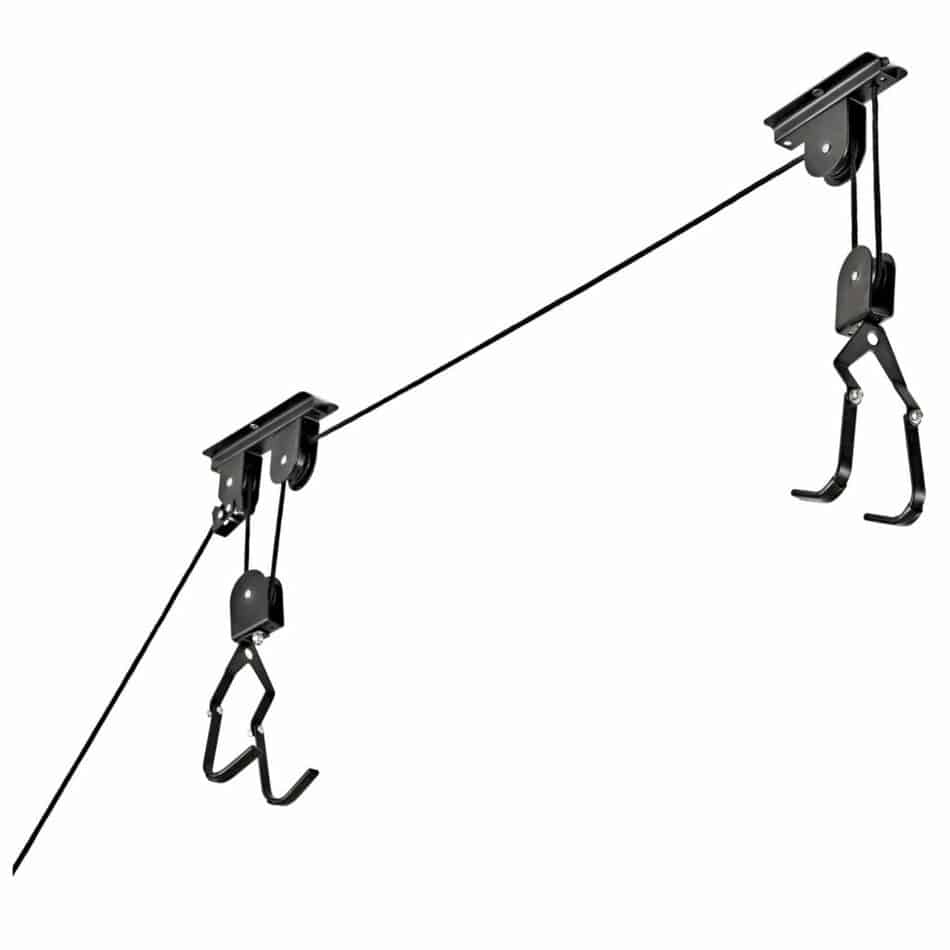
2. RAD Cycle Products Bike Lift Hoist (Recommended For Cheaper Budgets)
The Rad Cycle Bike Hoist is one of the more popular bike lifts. The hooks are created with rubber coating to prevent your bike from getting scratches while they hold your bike.
This bike lift system can handle heavy bikes, because the system is designed with a 100 lb capacity. This is one of the exceptional features, because most lifts cap at a 50 lb. capacity. This lift has no problem lifting a heavier electric bike or a commuter bike that is rigged with bags.
In addition, this product offers a lifetime warranty. If something goes wrong with the product you can contact the company to get a repair/replacement.
This bike lift can work for ceilings as tall at 12 feet, and has a safe locking mechanism that will prevent the lift from releasing the bike.
If the bike’s supposed to be lifted at the ceiling it’s not going to come down. This is a comforting feature, because no one wants to see their precious bicycle crash to the ground.
With this mount and depending on the size of your bicycle and ceiling height, you’ll be able to free up 6 to 8 feet of space underneath it. Lastly, it can hold a variety of bicycles as long as they’re within the weight limit. This includes tandem bikes.
A couple tips for this product
- Plan Ahead! Plot out where you’ll install the hooks and system before you start drilling screws in. You’ll want to measure everything out before jumping into it. While not absolutely necessary, it is helpful to have a second pair of hands with installation.
- Cut Rope When Bike is Lowered. You may want to cut some of the rope after installing, because there is likely to be excess. This is fine, but make sure to do it when the bicycle is lowered. One user unfortunately cut too much rope, and had to re-tie it together to make the product functional again.
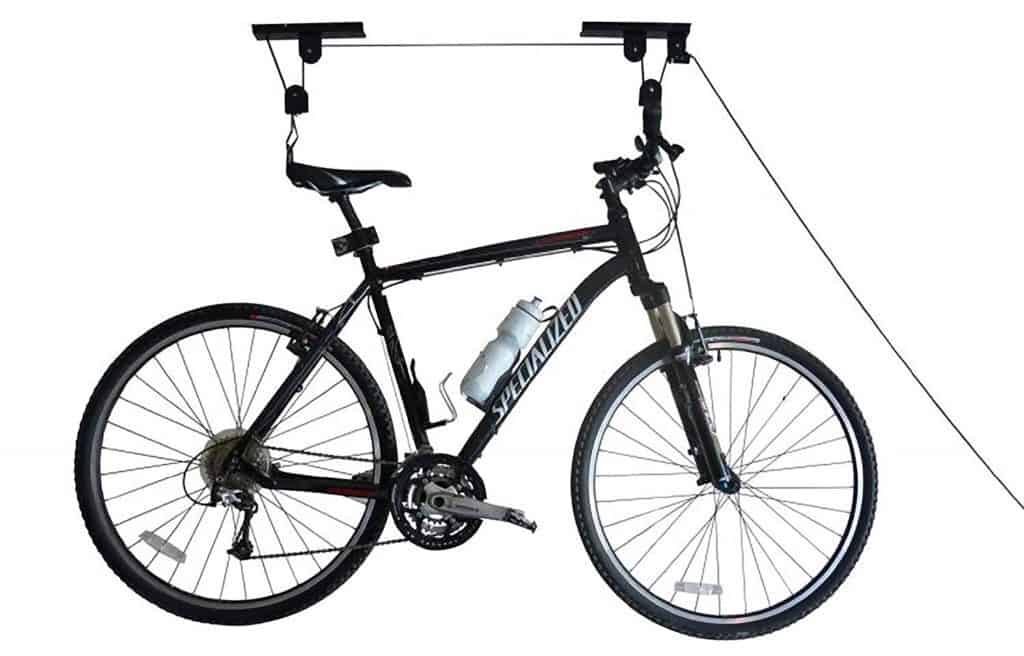
3. Best Lift For Lighter Bikes – Racor Ceiling Mounted Bike Lift
Another great option is this pulley system sold by Racor. While a solid product, one of the downsides is that it can only lift 50 lbs.
For most bicycles this is not an issue, but if you’ve got a fat bike or an e-bike you may be pushing it. Built with durable materials this bike lift is made to last.
This system can be installed on ceilings up to 14 feet high, and also has a locking system that keeps the rope in place when it’s not being used.
One of the benefits is the ease of installation. The manufacturer Racor boasts that it will only take minutes to install. I’d wager if you have all the tools (screwdriver and drill) ready you could have it done within 10 to 15 minutes.
Installation is Easy
- Make sure to plan out where you’re going to put the cleat before you install the lift. The cleat is where you can tie off any extra rope. You don’t want to have a lot of extra rope hanging from where you mount to the cleat.
- Measure out the distance between your handlebars and the seat of the bike. This is the distance you’ll want between your two ceiling mounts.
- Mark this distance on the ceiling over joints, and use 2 wood screws to install the back pulley and front pulley to the ceiling. Make sure that the distance between the two pulleys is the distance that you measured. It also helps to pre-drill 1/8″ inch pilot holes to get the screws in. Measure twice to be sure!
- Put the rope through the pulleys.
- Use 2 wood screws to mount the cleat on the side of the wall. This is where the extra rope will be stored when the lift is not in use.
4. CARTMAN Bicycle Hoist
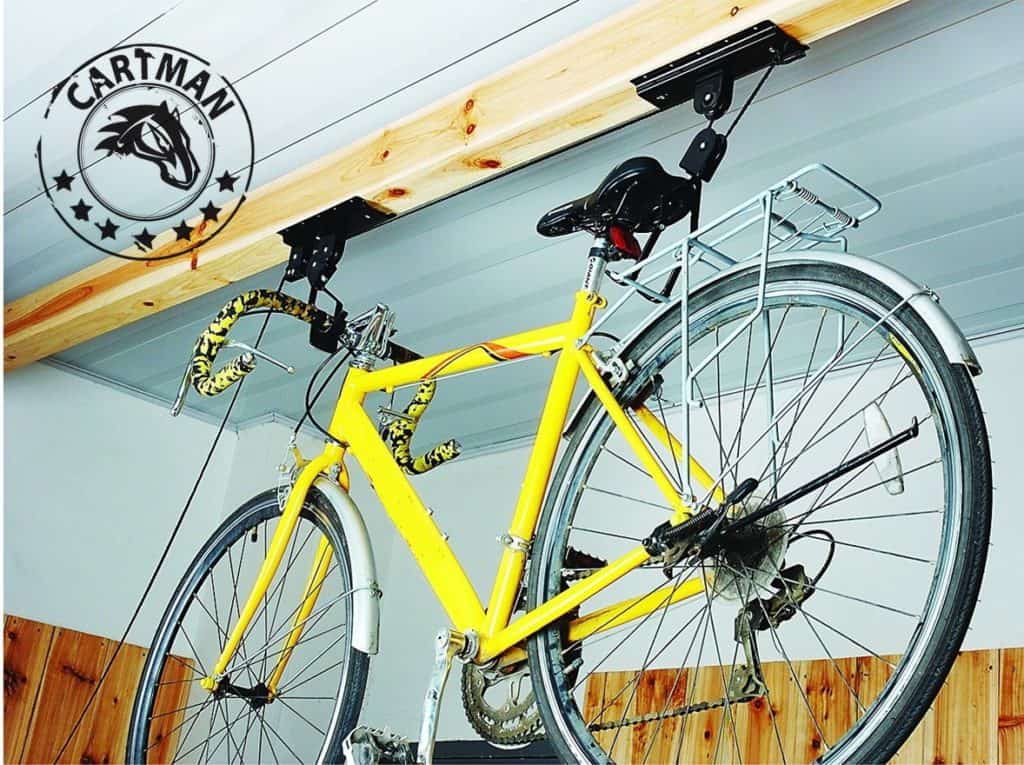
The CARTMAN bike hoist shares many of the same features as the first two lifts reviewed. It’s got a safety mechanism to keep the bike secure.
This lift can handle a 50 pound bicycle and reaches ceilings up to 12 feet. Rope is made of nylon and the mounts are made of steel. Upon purchase, you’ll receive the pulley stem, mounts, hardware, rope, and rack.
The positive of this pulley is that it’s a cheap price, but this does come at a cost. There’s been reported issues with the hooks having their rubber covers slip off which could cause your bike to get scratched.
This can be fixed by placing superglue inside them, but it does require a bit of work. In addition, some users found the rope to be adequate at best. It gets the job done, but is not as high quality as some of the other products reviewed. I’d recommend this bike lift only if you are on a tight budget.
5. Best Budget Option – Bike Storage Bike Hoist
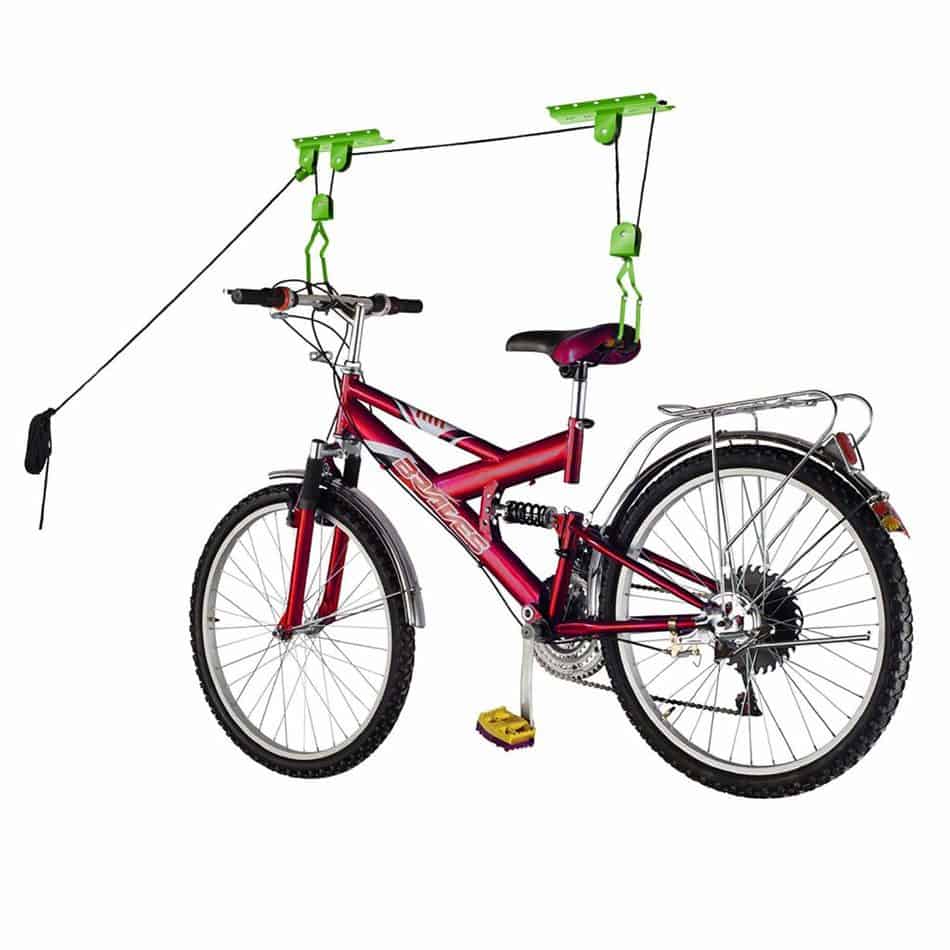
Forget getting a boring black hoist system! Bike Lane manufactures a hoist system that will bring color to your home.
This is one of the better hoist systems on the market being able to lift 100 lbs. of bicycle up to ceilings 12 feet high. Doesn’t matter what kind of bicycle is it. This hoist can lift a mountain bike, singlespeed, cruiser bike, road bike, e-bike, kid’s bike, and even a fat bike.
Check out the Bike Lane Storage Hoist on Amazon here
6. Delta Cycle Bike Hoist
Looking to free up space in your home? This could be the bike hoist for you. It delivers just as it promises with an efficient pulley system that can lift bicycles up to 50 pounds.
You don’t have to use it for only bicycles, because it could also be used for lifting ladders, kayaks, or other objects using the hooks provided.
It’s an excellent product, although some users say the rope wears out after many uses. If it does you can replace it with a fresh rope as there’s nothing special about it.
It’s good value for the price and easy to install. Make sure to locate the ceiling joints before you start screwing the mounts in.
If you have multiple bicycles you could purchase extra kits, and hang them all up on the ceiling. If you do this you’ll want to make sure you properly measure out the distance between the pulleys so they don’t bump against each other.
You should be fine if you set them about 1 to 1 1/2 feet away from each other.
7. Zero Gravity Racks Bike Rack
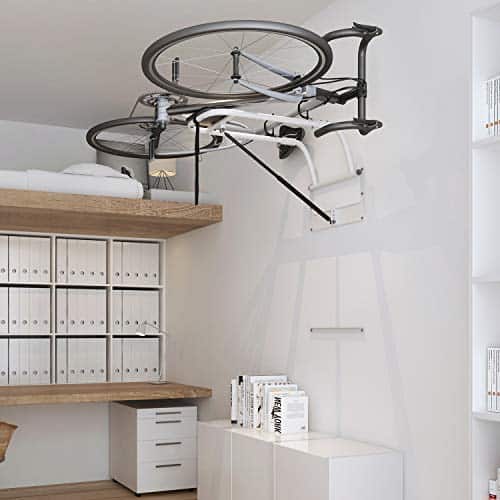
The Zero Gravity Racks system allows your to lift a bike off the ground easily and securely. It’s designed with a gas strut system that makes lifting and lowering heavy bikes a breeze.
This is a perfect way to save space for those of you who just need to save ground space.
Installing it takes less than 20 minutes, and will be able to hang bikes up to 50 lbs. The Zero Gravity Racks system can store women’s and men’s bike regardless if they are mountain, road, or a cruiser.
To top it off – this product has a thirty day money back guarantee. If you get this product and it doesn’t meet your needs than you can send it back with no questions asked.
The rack has a white powder finish that’s a nice aesthetic for modern homes. This could be the perfect storage system for your home if you’re looking for one that won’t be an eyesore.
8. Saris Cycle Glide
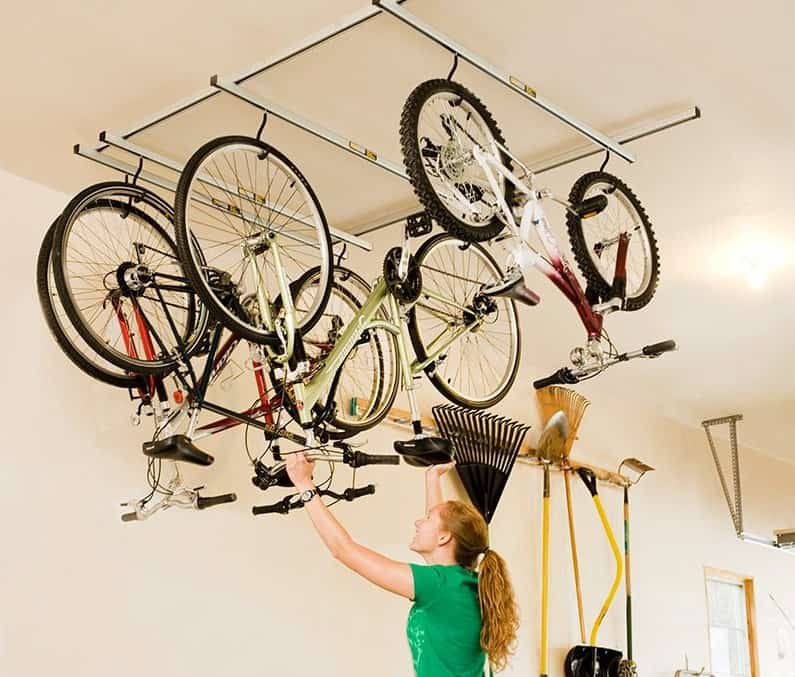
The Saris Cycle Glide is not a bike lift system, but I’m putting it on the list because of its ability to store multiple bicycles off the ground and near the ceiling.
It utilizes hooks that you can put your tires into to hold the bike upside down.
Are you worried that your bike will get damaged if it’s hanging by the wheels and upside down? I wrote an entire article on the subject (read here), but the short answer is it won’t cause any damage unless you’ve got a bike with hydraulic brakes.
A bike with hydraulic brakes could have issues being upside down. Read the aforementioned article if you’re a hydraulic brake bike owner.
The basic Saris Cycle Glide can hold up to four bicycles, but you can purchase additional pieces to raise the capacity to six bikes. The hooks can be adjusted to accommodate different sized bikes making this a perfect storage option if you own a lot of bicycles.
The only real downside of this setup compared to the bike lift system is that you’ll need to lift your bikes to the hooks yourself.
If you’ve got the muscle this won’t be an issue, but if you haven’t the strength to lift a bike over your head than you should think about another bicycle storage option.
Is your entire family into riding bicycles? This could be the right storage method for you.
Other Questions
Should I install these racks inside or outside? You must have a ceiling to install these lift systems and have them work properly.
If you’ve got a part of your house that’s outside, but has a roof over it that would be fine for these racks.
I’d recommend against storing your bikes outside though, because the elements will corrode your bike over time. Even with a roof there’s condensation, fog, and wind that can slowly damage your bike over time. I’d only store a bike outside if there was no other options or it was a beater bike.
Can these be installed by a single person? All of these bike lifts could be installed by a single person, but it would be easier with another to help.
Invite your friend over, hand them a beer, and you can chat about riding bikes while you install your new bike storage system. Trust me – it’s much easier with another set of hands.
Are these able to installed only in a garage? What about an apartment or living room? Every single bike lift system on this article could be installed inside a garage, apartment, bedroom, or basic room.
As long as there’s a ceiling that you can install the mounts into than you can install any of these systems. These bike lifts aren’t only for garages.
What other bike storage options are there? There are many different bike storage options. You could buy hooks (seen in this article) that can be placed in your ceiling or walls to hold your bike vertically or horizontally.
There’s various wall stands that can hold 1-2 bikes. There’s basic bike racks that sit on the ground. In the end, there are lots of different options and no best way to store your bike.
It comes down to your own specific needs, space, and preference.
Are there actual lifts that can hold 6 or more bicycles? Some of you LOVE biking and have a plethora of bikes. There are motorized lift systems that can hold 6 bikes and lift them into the air. You won’t need to do anything, but set them on and press a button to lift them to the ceiling.
The only problem is that I haven’t found any that were good enough to recommend. All of the ones I saw on the market had some serious flaws.
With this said, they are out there. Just google around, and you’ll find them. If you find one that you would recommend please let me know about it! My contact information is here.
Are hanging my bicycles bad? Absolutely not! Bicycles are made to withstand the weight of a rider and the bumps of the road. You won’t damage your bike by hanging it unless the hooks aren’t covered.
Make sure whatever system you purchase has hooks that have protective covers on them so you don’t scratch your bike up.
How close can you hang bikes? Different people will tell you different things. If you don’t want your bikes to touch or bump against each other you should space them out at least 16″ apart.
You could get closer if you need the space, but the handlebars and pedals may get entangled with each other.
Obviously, you can space them beyond the 16″ to ensure that the bikes never touch one another. The pedals and handlebars do have the potential to scratch another bicycle.